About this video
What You'll Learn
- Use Pulumi and TypeScript to provision IPv6-enabled Packet servers and configure Kubernetes node networking prerequisites.
- Understand how kubeadm initializes an IPv6-only cluster with service and pod subnets plus DNS settings.
- Apply Calico CNI and BGP route announcements so pods and services receive reachable external IPv6 addresses.
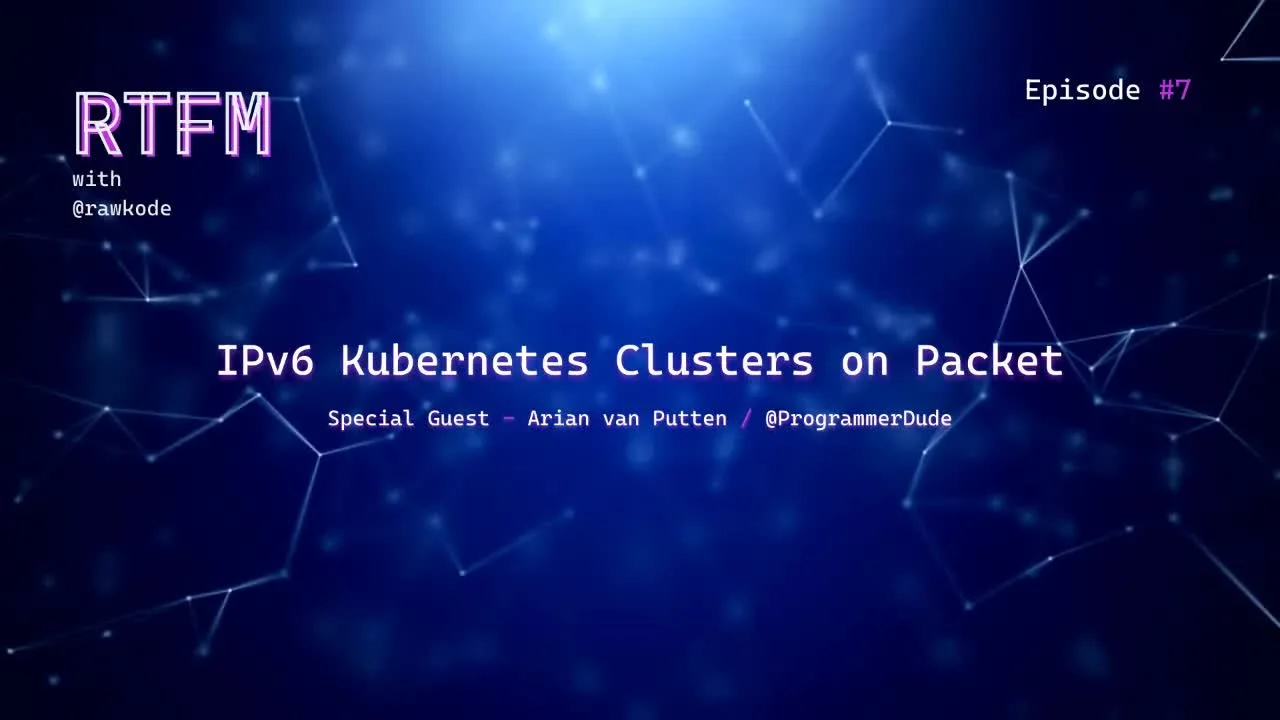
Arian van Putten walks through building an IPv6-only Kubernetes cluster on Packet bare metal: provisioning nodes with Pulumi and TypeScript, bootstrapping with kubeadm, installing Calico CNI, and announcing pod and service IPv6 addresses to the upstream router via BGP.
Jump to a chapter
- 0:00 Holding screen
- 1:30 Introductions
- 4:40 Why are we deploying an IPv6 ONLY Kubernetes cluster?
- 9:40 Is this secure?!
- 11:50 Tutorial begins
- 13:55 Creating our servers with Pulumi and TypeScript
- 30:00 Refactoring server provisioning with TypeScript (Why I love Pulumi)
- 34:00 Installing Kubernetes with kubeadm
- 49:30 Installing CNI Calico
- 59:30 Deploying nginx
- 1:00:00 Announcing Kubernetes pod IPv6 addresses with BGP
- 1:11:16 Announcing Kubernetes service IPv6 addresses with BGP
Full transcript
Generated from the English captions. Timestamps jump the player to that moment.
Read the full transcript
1:30 Introductions
1:31 Hello. Hello. Hello. Hello. Hello. Good afternoon. It is. It is nicely just afternoon. I'm only a few minutes late. Thank you for joining me today, Adrian. How are you? I'm good. Yeah. I'm considering the circumstances, but yeah. It's a good day to be inside because it's raining. So so Yeah. Where are you based right now? I'm currently in Berlin. Yep. So I I I work here at at wire for the past year now. I moved to Berlin, and then I ended up working from home in Berlin because the office is closed, obviously. So this was not
2:15 completely as planned, but it's still fun. And yep. And I will probably plug that we're hiring people for Kubernetes things if you're interested in that at the end of the show, but it's not always looking for more people. And but, yeah, I do DevOps stuff there. So I do both development and operations responsible for keeping all our all our infrastructure running and building new features. So we're kind of a mixed team. We do all kinds of stuff. And in my spare time, I also torture myself with these kind of things. And yeah. Actually, I I didn't
2:59 have I p v six at home in Netherlands because we only have, like, 15% adoption rates, like, one of the lowest in the world. And Germany, it's, like, 70%. It's super high. And so when I moved here, I noticed I had an I p v six address, not only one. I had a trillion per machine on everything on my network. Was like, this is very weird, and how does this work? And and I decided to learn a bit about it by messing around with it in Kubernetes, and that was a bit of an adventure. So
3:29 Well, I'm hoping that we can take all of your learnings from that adventure. And Yeah. I can absorb some of them, and we can share some of them with people that are watching as well. Yep. It's gonna be awesome. Yeah. So they're also quite involved in Next. Right? You're you're my go to Next person. Yeah. Yeah. So I do I do maintenance for NextOS. I I maintain the the the system d packages and the that also touches all the container stuff automatically. So kind of in that area, making sure that service management works in the next OS
4:00 and having all that stuff running. And I also do the let's encrypt stuff for next. So automatic certificate renewal for if you create an NGINX service with the next OS and stuff. Yeah. That's a lot of fun. Yeah. It is yeah. Also, if you want to check out this project later, it's also set up with next. It will download the right version of Kubernetes and everything. It's yeah. Awesome. Yep. So I'm trying to I guess my first question then, you know, which I've straight into the the the why. Why why are we doing Kubernetes I p v six only cluster?
4:40 Why are we deploying an IPv6 ONLY Kubernetes cluster?
4:42 Yeah. So what did you think the first time you learned about, like, Kubernetes networking? What was it very obvious to you, or were you very confused? Because I was very confused the first time I read about all these things. Like, overlay networks, spot network, service IPs, net cube proxy. It's it's it's like Oh, yeah. It's very confusing. There's so much to speak in, so many different components. And then depending on the CNI implementation, there's different abstractions on top of that. Yeah. Yeah. So you have to choose, like the first thing is, like, Kubernetes is gonna make super everything
5:18 super easy once you make all these difficult choices. Right? Like, there's 20 different CNI plug ins with your VXLAN, IP overlay networks, or you can use the stuff from your cloud provider to set up routing. There's like a million different choices. Right? And so, one of the first promises that Kubernetes makes is like your pod network is flat. Every pod needs to be able to talk to every pod without any netting or whatever. Every pod gets an IP and it needs to be reachable for each other. Right? And kind of the the thing with that is
5:56 is that means you need to have a unique IP address for each pod that you spawn up. And with I p v four, that's kind of expensive because I p v four addresses are not cheap. So what we usually have is we assign pods private addresses, and then we set up this overlay network using, I don't know, some IP and IP overlay network or something such that all the pods can talk to each other. And and the only reason why we have this overlay abstraction is really because we we cannot give each pod a public IP
6:29 address and let just routing magic happen. Right? And then IPv6 was designed, I don't know, twenty five years ago. And they said, well, what if we just make this address space bigger and then we can just give every device a public IP address? And then we don't need to bother with netting and overlay networks and all this stuff. And every device gets a public IP address, and we just set up routing tables such that things route the correct way. And this makes the world a lot easier in my head because I don't have to think about what
7:09 is the IP address of my router when I it's just when I go to a website, they see the public IP of my laptop. This it's just a it's a one way route. Right? And this also makes the whole it fits very well this pod networking model. Like, every pod has an IP, and each pod can reach every other pod. Like, it fits this I b v six world perfectly. And we do not need to well, we can still do overlay networks and all this stuff, but we don't have to. If we just assign everything a public IP and we make
7:38 sure that there's routes between the two node or three worker nodes, they they know that they can route both IPs from one to the other, Then we can just expose all pods directly to the Internet, and then people will say, what? It's not secure. What what are you doing? Yeah. We'll get to that to that later. So I think for that, IPv6 is really cool because it really fits this network model of we have a flat network very well. And that's like the basis of Kubernetes networking is we have this flat network model. And if we pick it, then we have
8:09 a lot less stuff to worry about. So I think that's a bit of a reason why I think I v v six and Kubernetes is useful. Also, yeah, you you get a lot of IP addresses. So you don't have to worry about all this IP address management and how many how many pods can I schedule and I don't know? They're infinite. You don't care. It's just if you want to schedule a trillion pods, it will still work. But so, yeah, just having a flat address space makes things a lot easier. And Exactly. Yeah. So there are a couple of things there. First,
8:49 Adrian. Thanks for watching. Second, I just giggled that as you were chatting there about IPv six being 25 years old. And I was like, oh, I remember I read a story about we ran out of IPv four addresses. Yeah. And that actually happened the first time in 2015, I believe, North America ran out of addresses. And then, officially, all IPv four exhaustion happened in 2018. It's been more two years. Yeah. We still haven't gotten that sorted yet. Right? Yeah. Correct. But today, we're gonna do it. We're we're we're gonna have a I p v six
9:23 Kubernetes cluster. Exactly. So Yeah. Is the security like, I mean, the first thing when you say, let's get every node an I'm desynchronous. Like, you mentioned the security. Is that something you wanna talk about now, or we'd say that as we began to spend this up? So I left it as an exercise for the reader, of course. No. But we'll talk about it at the end. But I think we have a good story for it. So, basically, if everything is public, you're forced to make proper firewall rules. That's basically the trick. Instead of relying on the fact that your
9:40 Is this secure?!
9:57 overlay network is not reachable from the Internet, this is all but security through obscurity. Right? It's not that you and Kubernetes has some very nice things for this. So, you have network policies where you can describe declaratively what pods can talk to what pods. And if your CNI provider supports it, it will make your network secure. And you can also do things like, I don't know, service meshes like HCO to have everything encrypted. And this is all levels that you put on top. We'll start with every pod can reach every pod. As a side effect, it
10:31 will mean the whole world can reach every pod because it's IPv6 and everything is public. But if we start from the basis is very simple, then we can bolt on security later. And, yes, it is important, but it is also important if your pods have private IP addresses. Because, I don't know, maybe for some reason, you have some rule in your firewall that forwards things to your prod IP space. And then still things from the outside could reach it. So it's always good to have this kind of network policy set up inside your Kubernetes cluster. And making everything
11:06 public by default, we're kind of forced to do this zero trust thing, right, where we trust nobody and we have to bolt everything together. But I'm not sure if we're gonna get to that part, but I can give some links on how you could set that up. But we're just gonna go for a very insecure, very public Kubernetes cluster today, I think. Okay. So yeah. So, I mean, I've got dozens of questions. But rather talking about it abstractly, I think we we get started, we put it together, and then Yep. The moving components allow people to kinda follow along as
11:37 well. Yep. And there's just a little bit of noise in your mic, if you could just push it away a little bit. Better? Yeah. Sometimes it picks up the the briefing if it gets too close. Yep. Just tell me just tell me when it happens again because it tends to slowly move back. Yeah. Yep. That's alright. Perfect. Okay. So I am gonna share my screen. I have, at your request, created a server. The reason we have a working node server is because this cluster is only available in the I p d six space, and my ISP does
11:50 Tutorial begins
12:13 not allocate me an I p d six address per virtual version. So that server is here so that we can interact with that customer needs. It's the only reason I will be working remotely today. Mhmm. I have a Versus Code window here, which if I create a a little text, your cursor should magically show up. So we have the ability to collaborate on this as we go, which means that you get to fix all of my errors, which is awesome. And we have a terminal where I have configured just enough and hopefully not forgotten anything to
12:50 get us through this. So I have prepared Terraform. I have installed Terraform, Kube CPL, Pulumi. Yep. We we will need one more thing that we need to install. We're gonna need to well, on a kubectl, we don't need. We need that on the notes. That's gonna be fine. We'll need calicoctl as well because we're gonna use the Calico network plugin in this demo. And it uses its own command line tool to configure things. So, uses custom resource Kubernetes custom resource definitions, but not for everything. So for some things, you still need their their CLI. So yeah.
13:34 No problem. So we curl that. Shimon plus x. Oh, yeah. We'll give that a second. There we go. Now we can move this. Yep. Okay. So we have everything we need. And if we need anything else, we'll deal with that as we go. Yep. Alright. Step one. What do I need to do? So we will need some servers. Right? So I will need a a master node and some worker nodes so we can set those up. Okay. And I've never used Pulumi before, so I'm very curious. It's Yep. I'll talk about why I like it.
13:55 Creating our servers with Pulumi and TypeScript
14:21 This director is an empty site, so why need to add this force. I'm using the packet TypeScript template, which just means that it configures the the provider to provision packet infrastructure, and I'm gonna choose to write my code in TypeScript. One of the things I really, really, really, really love about Pulumi is that you can use most well, supported programming languages. So you can use the tools you're comfortable with. For me, I use TypeScript. You may wish to use Go or Python, and even .net is supported. So it's cool. Now this wizard is going to ask me
14:56 for the project name, description, and stack name. Oh, let's call it prod. And something I really like about Pulumi as well is it has a configurable secrets provider. Mhmm. By default, I can just type in a release secure password. And, hopefully, I remember what I ugh. I'm failing at typing today. Hey. I don't know if that's even right. Okay. So and by default, we're using a password based encryption, which means any secret site access project relevant to get repository and correct people with that password. It does also connect to cloud service KMSs and to Vault. So
15:50 if I really wanted to make this a bit more secure, I could say, go speak to this Vault server, get a a management key, or go speak to GCP, KMS, AWS, KMS, or even Azure KMS. Yep. That's nice. Yeah. Let me it's cool. Although I do I know it's one of these really superficial things. It does bother me that the index dot t s gets created in the root directory. I I don't think that. But You you want to that. Not gonna let that stop us. Right? Yeah. No. No. I'm gonna pick it. So I'm
16:19 just gonna create a source folder. I'm gonna go pull in here. And the only thing I need to change is main source and that k. Cancel. Okay. So we're now in a position where we can create a server. Yeah. That's good. Okay. So this should have installed the SDK for me, which means I should already get all complete. I'm gonna confirm that first. What we is this like a a management server I need to create first? Do we need more than one server? We'll need a a master node and a worker nodes or so let's let's have two in total. We can
17:10 have one and do everything on there, but it's more interesting if we have two because then we can demonstrate that networking across nodes actually works, and I'm not bluffing. So let's do two. Yeah. We can maybe let's do so you want to make one, like, where the control plane is gonna run, like the cube control plane, and then some workers. Got it. So that's a our admin server, which I'm just gonna call admin. And it's a few required properties. So so we'll go over it onto that. We will need okay. Are you typing, or you're just trying to
18:06 trip me up? Is that what it is? No. No. I'm I'm not touching the keyboard at all. No. And we get all complete on the operating system. It should be possible. So let's go with the good two eighteen o four. So our newer versions, but I think the provider doesn't have all the list yet. Mhmm. Yep. Okay. So we do need a project ID. Let's put that as a question mark. We'll need to bring that to a configuration. Yep. And we need a plan. And is there any minimum sizes that I'm gonna require here? So I've been using the the
18:44 the old t one micros, which I don't know if they're even I can still spawn them up, but they are not in the list anymore by default. So just the smallest thing, it's fine. There's no you know? Okay. I'm gonna start with c two medium. Okay. What else does it require? So it's telling me I need a balance cycle, and my facility shouldn't be where are you? Let's see. Oh, I lost connection. Wait. Reconnect. Let's see. Hopefully, we're okay. Okay. So let's do balance cycle. We'll do monthly. I think that should be. I'm not sure
19:28 why that's. What am I missing now? So I'm gonna type facility. Host name is missing. Okay. Yep. We need a host name. Yes. Alright. Just admin. Admin. Yep. Oh, the red squiggles are gone. That that's a good thing. Cool. So the project ID is currently lacking, plus we also need to tell this oh, we need to configure the organization. So the two setup pieces that we have to do. So first, let me config set. Let's do project ID. And I can grab this value, which is not a secret. So you pre created a a packet project. Right?
20:30 It's a Correct. Yep. I don't believe I need the organization ID, but I will add it just in case. And we need one secret as our off And that just gets namespace as accurate, I believe. And it will get it from your secrets file automatically. Or how does this work? I'm gonna paste the end while no one is looking at me. So if I just hit return here, pop over here, and same file. I'm still getting used to this Mac nonsense. Okay. There is my API token. Oh, if I have opened, it's gonna open it. It's
21:32 that's good. Hey. And clutter clutter. And you okay. And then because this is a secret, we could write a password, encrypts it, and if we we don't need to see view. If we open our production configuration, here's what we have. So Uh-huh. We have two project specific configuration options, project ID and organization ID. And we have a packet provider configuration where we're off token, which is nicely encrypted with my super secret password. Perfect. I hope. So do I need to provide organization? It does not appear like I do. Also, the port ID is enough with my
22:22 AI token. I think we're almost in a position to test this. But first, we need to add our config. Here. And then replace our credit ID here. This is going to be require, and we told it reject ID. And the moment of truth. Let's see. And now you forgot the pass phrase. Right? I have not forgot the password. There we go. Okay. Alright. Well, we haven't really allocated any user data here. I'm assuming we actually want this machine to do something. Right? Yep. No? But well so do you want to do all this stuff through a user data
23:34 file, or do we just want to SSH into it and go through the process manually? I think that it's better to do it manually because we'll probably make some mistakes. And if we have to wait every time to reprovision a machine, if we change the user data, it might be a bit slow. So we we we we can act as if as if we're doing this all the correct way, but we'll just SSH into the box and do stuff there, I think. Okay. So as we SSH and do stuff, I will just update something locally in our
24:06 repository, and then when I publish this online, it will be fine. Yep. Yep. So saying that my balance cycle must be one of error rate. If I changed it to error rate. Yeah. I actually do also have a reference repository I can share afterwards, which sets this up on the flat core Linux with some user data. So if people want to run a demo from scratch at home, then it should it should work. Okay. I will try this one more time and assume that we're just syncing my changes remotely because we are using a remote dot
24:40 payment. Now that that's our label, it works. That looks much better. Okay. So we have a machine spinning up. Yep. So we have not tweaked the networking configuration of this machine. So that means that by default, we are going to get a machine that has two I p v four addresses and two I p v six addresses, I believe. One I p v six address, actually. One. Yeah. One. Yeah. Because so we will get a private I p v four and a public I p v four, and we will only get one I p v six because there is no such thing
25:14 as well, there is such a thing as private I p v six, but it's highly unusual to use. So and one thing that you'll also see in the packet project is that not only did we get an IPv6 address for the box, in the project itself, under Networks Yes, under IPs, we'll see that we now have a public IPv6 block allocated to our project. And this has trillions of IP addresses. So it's two to the power 72 IP addresses that we got assigned. And we will use this later because we'll use this block also to allocate IP addresses for
25:57 our pods. So not only for the nodes that we create on packets, which will which packet will do automatically, we'll also do it for the pods. So can we have data sources in Pulumi? I want to get this I p v six block into our config because we're gonna need it. This is something we can do. Yes. We can do that. We have we we have access to yeah. We can use data sources. It's the same way Terraform which is in. Mhmm. Definitely. Yep. So we can either copy paste this block and or we can use a data source
26:34 to retrieve it, and then whatever you think is cooler. Okay. Let's start as a conflict right now, and we'll see how we're doing for time. And I can always, you know, clean this up later. I'm I wanna let's we'll focus on the Kubernetes IPv6 steps. Yeah. Exactly. So let's just split this term. And configs the IPv6. Exactly. K. So that's just gonna take I've been to eighteen o four as one of the fast provision boxes. I would expect this to take maybe around two minutes, maybe three work case. We look at the progress. We can actually
27:24 see it's just rebooted, and it's gonna put on hold. So it's actually always done. Yep. Cool. I I Okay. The other thing I did do was enable BGP on this project. So we do have BGP set up. Yep. So there's also so just for the record, we're going to use Calico, which is a CNI provider that integrates with BGP. And for the listener, BGP is a protocol you can use to talk to your router in your data center to announce routes. And what we will do is, and we'll also see this update in this window later, is we'll announce where pods are
28:03 in our data center. So, we can tell the routers and packets this pod is running on that node. So, if you get a request to this pod, send it to this node in the cluster. And this way, all the pods can find each other. The pod will send the requests out to another pod. It will go through the packet router and then to the node that has it. And we'll use BGP for that. One thing that we'll have to set up also in is we will have to tell packets that this server that we created is going to talk
28:37 to the router. And in TerraForm, this resource is called let me peek Packet BGP session. So we'll have to create a packet BGP session which associates the device with the packet router. K. So Yep. BGP session for new packet BGP session. Exactly. And this is our admin this is our publisher for publishing works. Is that Yep. Right. Okay. So what do we need here? I think a address family and a device ID are the two things that we'll need. So this will be IPV6, and then the device ID is the server admin. Yep. I would be
29:39 Exactly. Send Do we also we already want to create a a worker device as well? We can just copy paste this code and bring it and set host name to worker. So there we are. Worker. Worker one. Worker one. Mhmm. Is that it? Yep. And then also create a BGP session for it because we also need it. Okay. So do we right. One I I I always had too much time on the political stuff. But because we need to do that repeatedly Yep. What what we can do is if we grab this, make this a function.
30:00 Refactoring server provisioning with TypeScript (Why I love Pulumi)
30:39 Yeah. Which returns a new server. And then here, we see create server, and we'll inject our name with string. Why are you to print? Oops. Sorry. What's the multiple string types? Host name, which I guess we can just make the name of the server. Mhmm. That makes sense. That's it. Right? Yep. From here, I can I want to be able to reuse that resource? I'm just gonna pull the admin and not change that. Okay? Mhmm. We will then I never remember. I lost the person working on that. Anyway, server worker one, server worker two. And are the BGP sessions the same for
31:43 all of these? Yeah. So there will always be address family I p v six and then the device ID. Yeah. And this is just so that the packet routers know that these servers might announce routes to the router. Otherwise, it will reject will reject all the BGP traffic. So Perfect. You will have this return, a JavaScript object, which now has a BGP session. Yep. We'll give it a name and then It's like enter an internal reference. Put that in a variable. Yes. If I would smart, I would have called it device. Oh, yeah. Think I'm gonna use this fancy
32:34 JavaScript syntax. Yeah. There we go. We were refactoring our code. So now we have a function that creates a server and the BGP session, and then we create the three devices and the three BGP sessions. Yep. Sounds good. So let's just apply that, and then we can already start on the admin node and configure some stuff. Perfect. So if I put pulling me up. Password. K. Five to create I'm hoping that's when I realized it's wrong. Yeah. Well, you would expect it to Well, it's only it's not creating the the device. Right? That's good. Yeah. It's only creating the
33:24 speech to speech session. Okay. Good. Perfect. Oh, yeah. Two unchanged. Yep. Alright. So let's jump on to our admin. I never thought of this part. I would do this for iTerm. I don't think my key is gonna be passed through, but let's check. Uh-huh. Right. Three. Put your font. Alright. That's the page. Yeah. Now I have access to my YubiKey. We're in. We're in. K. So we're gonna use Kube ADM to bootstrap a Kubernetes cluster. Have you used Kube ADM before? Not in three or four years. Okay. So it is not too complicated. Usually, it's just you type kubeadm in it,
34:00 Installing Kubernetes with kubeadm
34:31 that's all you have to do. But of course, because we're running IPv6, we need to tweak some configures some configurations. So we just need to install kubeadm and the kubelet so that we can bootstrap things. Oops. I'm working. So then so it seems pseudo, but we're running a group. Are there any more pseudos here? Yep. There's still a pseudo apt key. Yep. Perfect. Yeah. And this is obvious obviously something we would add to our user data usually because we'll have to run it on every box. I'm going to I'm going to cheat a little bit and give
35:29 you a kubeadm config instead of us reconstructing it from scratch. If it's on your repository, what I could always browse to it? Yep. So it is in my repository, but it's templated. But that and we'll have to fill in your IP addresses. I should have just used the Terraform, but we'll we'll keep it. No. No. It's fine. I I have plenty of time. It's okay. I will send you a link. Let's shall I share it through the Yeah. This is the private chat. Put I've put it in a comment in the index dot t s.
36:11 Ah, I'd save. K. So you'll see a a kube a d m slash config dot yaml Yep. Which contains everything we need. So if you just copy paste that into a file, and then we can fill in the blanks. Okay. So what is this call it? No. I'll keep it at the end of config. So in fact, highlight in there, I think. No. It's YAML, obviously. YAML. Yep. So Something different is that isn't YAML or is that sync? Yeah. So So this is an Ignition config, and we only need the cube ADM part of this. So we can
36:59 remove a whole bunch of things. So this is basically a the user data of a of my flat core Linux device. So if I will let's see. I'll just open the window as well, and then I can edit. Right? Mhmm. Okay. It's loading. Come on. It won't load. Live share is cool when it works. So if you just if I just close it and reopen it, you'll get popped into it anyway. So let's do that. Nope. It seems to be sort of disconnected somehow. It's it's still convinced that you're editing the index of t s. This is
37:56 but yeah. If you scroll all the way down this file, you'll see a little bit up. You'll see this cube yeah. Down. No. No. No. More down. More down. Yeah. Kube a d m slash config dot yaml. And this is the only content that we need. So so there's a the the contents of that file is the only thing we need. So we can remove all the other stuff in this file. Just copy that out. Yeah. Exactly. And we just want this available on each of our notes. Right? Yep. And we will have to and we'll have
38:32 to edit some place some things, some placeholders. So, the certificate key and bootstrap token, can just remove. We don't need them. When you leave them out, kubeadm will come up with default values. So, we can just delete those. Then there is the node IP, which needs to be the the I p v six address of our node. Okay. So is that our admin node? Yep. So if we go into details, we will see the IPv6 address. Yes, that's it. Okay. Good. And then we'll have the control plane endpoint, which will also be the IP address
39:21 of this node. And then the then we will have to come up with two IP subnets for our service range and our pod subnet. So this is where our virtual IPs will live and in which range our pods will live. We don't want to this to clash with nodes that Packet creates automatically. So what we're going to do is just copy paste your the IP address you just had into both. Okay. Remove the three in both cases. Okay. And the service subnet, we will make D001. So you see the D00? I got you. Oh, yeah. And then just
40:13 leave the yes. And then we'll do a 108 at the end. So this basically means that we will allocate all the service IPs will be prefixed with this part, and we need to do 108 because we can only have 1,000,000 service IP addresses in a Kubernetes cluster. It's some hard limits. If you change this number to something that is normal in IPv6, because usually, you assign 64 per range. Kubernetes will actually crash. I found this out the hard way. This is not documented anywhere. 108 is the magic number that we need. Don't ask too many questions.
40:55 And then the POD subnet will make d00 will make it two and then 64. Yes. So this means that we expect all our pods to get assigned to public IP address, which is what we want. Right? So, yeah, we can put this in a config dot YAML, which we copy over to the box. Yep. Is it if you disable the page for mounting. Oh, yeah. Set based or something. Right? Yeah. I think they're right. And then we want to and indent this a bit. Yeah. Okay. Yeah. Let's just do it that way. Yeah. That's good.
41:53 Right there. Okay. Yep. So let's save this. And now we're gonna type. Okay. Okay. So, there are a few things that we need to make sure before we can initialize the cluster. First is that we have a DNS server in etcresolveconf that is an IPv6 address. The reason for that is our pods will only have IPv6 addresses, and they won't be able to resolve external traffic if this is an IPv4 address. So we can pick one. If you go back to that file, I think it's in here. So oh, no. Wait. It's not. Wait. So we can, I don't know, take the
42:41 the Google servers or something? I will Alright. I'll just I'll put it. Yeah. Exactly. There it is. Yep. So let's put these in Etsy Resolve and replace those two at the top. We can keep one IPv4 one in there, actually, because otherwise, other stuff will get angry. So, yes, exactly. Perfect. Okay. So now we can do sudo kubeadm init dash dash config and then your config file. And it will run a bunch of preflight checks that will tell us things that are not configured correctly on our box yet. We might have to set up a forwarding
43:44 rule in the kernel or something, or Docker isn't started yet. So, yes. No Docker. So, let's apt install docker.io. You suddenly start to appreciate these managed Kubernetes services. Right? It's like Yeah. I I used to work for a company that runs, like, a a tender competitor in Europe, and we managed all of their Kubernetes clusters of bare metal. Mhmm. It was fun and challenging at the same time. So what is it angry about now? Oh, yeah. We need to disable yeah. It we will have to disable swap. So just swap swap off. Oh, yeah. Enable docker is also useful.
44:45 And then I always forget what you need to type here. STP2. Okay. Yes, perfect. So yes, and we need to set proxies net IPv6 config default forwarding to one. The reason for this is we're going to receive requests from other nodes trying to reach a Pod IP, right? And our server isn't listening on any Pod IPs. It's the Pods themselves that are listening on the Pod IPs. So if it receives an IP address that it doesn't know, it needs to forward it to one of the pods on the box. So we have to set up IP forwarding
45:23 for this. Yeah. I was trying to look at why that exists, but I just I I forgot the view. Okay. So I think we're now all set, and we can start bootstrapping it. Okay. Let's try that again. Okay. So, yeah, this will take a minute or two, plus it downloads all the required components, or it will crash halfway through because we forgot something. In the static manifest. Yep. And now so now it's gonna be pulling the energies for each of those those static manifests. Okay. Yep. And it will actually print out instructions how we bootstrap our worker notes.
46:18 So don't I knew you would do that. You'd always tell me you do this. Right? Just control l. So scroll up a bit. There's important information that we need. There is. But I I was wondering whether I really want people to be able to join my cluster. Yes. It's okay with well, this So yeah. So first of all, we can download the kube config. That's useful, I guess. So that's the very first step. So the kube config for this cluster is in at ckubernetesadmin.com, and we can copy it from the box to your management note if you want to,
46:51 so that we have kubectl working. We can already see if that works. So if you would do kubectl get nodes, see if it works, and then let's copy that. So yes, As you can see, the node is in a not ready state because that's because we haven't installed a CNI plug in yet. So there's no networking setup yet. But we'll get to that very soon. Do you just want to do it from the master node? Because we have ibv6 connectivity here as well, so it's nice and easy. So we're going to install Calico. Shall I just send you a link to
47:43 the comments that you'll have to type? Yeah. Go for it. Yep. So we will need the following two things. Where are you? It would be nice if we can get the share terminal up again. Do we want to try and see if we can get the live share to work? Can you do you see me type in index dot t s now? I do. Yes. Okay. So You should be able to type in my terminal, which is on the working note. Do you want me to Is that is that okay to do the commands there? Or or no? We need the
48:49 config. Right? Yeah. Yeah. So We we will need the cube config there, though, so the cube CTL works. That's all. So yep. Exports cube config equals cube config. I need the full path here. Right? I think. No. You can just do dot slash. Oh, okay. There we go. That's nice. K. So we're now gonna copy. I accidentally did something. What did I do? I created a new terminal. Oh, okay. Excellent. That still works. Okay. Pasting is a bit funky here. I believe I'm using KubeCTL create after my Twitter run about people using KubeCTL create. Instead instead of apply?
49:30 Installing CNI Calico
50:27 Yeah. Run for another day. Yeah. Yeah. Yeah. Then we are going to get installed. So this so Calico has an operator to manage Calico, which is kind of neat. And then I will make a new file here. Oh, control N opens a new browser tab. Let's see how I will press this. For some reason, it doesn't like me changing files. It just doesn't work in live share. So the terminal works fine. So So there's some oh, sometimes yeah. I've had that before in live share sessions too. There's a little, like, reload. I don't know if
51:29 you can see my screen right now. But if you press that, it generally kinda kicks it, the refresh explorer button. Where is this button? So on the sidebar about the files and directories, there's, four icons, and then there's, like, a wee circle with an arrow on it, and that generally just kicks it to refresh the file system cache. No. If I open a file, it just gives me a loading screen. So I'll have to guide you in typing. This is Okay. I can I can do this? I can do it. Yes. Okay. So let's go to
52:11 I'll give you a link, and then I'll tell you to try it yourself. This is always fun. Let's see what the link is. So is this on your GitHub stuff? Can I get it from there? Yep. Definitely. Alright. So top level, I go and say You can go to ignitionmaster.jamo. Got it. And we're gonna copy and I'll scroll all the way to the bottom, and you will see a Calico config. We're gonna copy paste that. So I actually just noticed this flex volume path thing. You might have to so this is only needed on FlatCar Linux because, by default, it tries to
53:08 install FlexVolume plug ins in user lib exec, but that doesn't exist on FlatCar. The thing is we also configured our control plane to use this path, I think, in our kubeadm config. Can you double check that? Because we might have to remove that part. Like that. Yeah. So this it might be that the cube the it starts complaining about this path. So we could quickly try and Yeah. Just try and. Yep. So if we go back to your terminal and we edit the config first. Yes. And we remove those extra arcs. So, yeah, both there and also in the cluster
54:04 configuration. Yep. Exactly. And then you can do kubeadm reset. And then without the config. So, first, we do reset and then we reinstall again. So, we just do reset. Okay. And then we want to run NA again. Exactly. K. Okay. And then we want to That's just on the machine. Right? Yep. And we also want to now cube key do the cube cuddle create or apply again. What about the first command, the command? I see that here, actually. Yes. It's in here. Exactly. Yep. So we can run this. Mhmm. Oh. Make config. Okay. Yeah. You have to
55:14 copy the kube config again because we now have new certificates. Right? So so oh, it it copies in interactively. So it refuses to override it because there's a c p dash I. Of course. So Okay, good. And now we look at this calico file that you have. And it's different from the one they ship by default. So we will have to change one thing here. The interface is not is I think it's bond zero in your case as well. Could you make sure that it is? It is. Good. So I disable ibv4 detection, and I enable ibv6 detection.
56:10 And this is just so that Calico configures itself as a ibv4, ibv6. And this by default, it does I p v four with an overlay network, a la Flannel. But if you have this option, it will use I p v six instead. Okay. So I think if you based on oh, I probably got by mistake. But I can paste in cube CTL, the eight point No. My calendar file. No? Yes. Yes. Sure. You said no. I wanted to say no, but it's yes. Yep. Hello. Yep. So now if we do kubectl get no gets let's get all pods. We'll see
56:56 that it's creating some stuff. Alright. Yeah. That will take yeah. It will take a little while for the Calico to come up. Okay. Nice. So And then what we did there was we installed the operator. And then based on the Calico.YAML fail here, it's determined that we need these parts. Right? Yep. Exactly. Yeah. Okay. And so the the the Calico cube controller will listen to network policies that you define and configure firewall rules. And the Calico node is what we call a BGP speaker. So what it will do is it will after we set it up,
57:46 we haven't done it yet, it will talk to your router, to your gateway, and it will announce so Calico node will run on each node in your cluster. And it will say, I have these pods, they have these IPs, and they are on this node. So it will say, pod NGINX1 is on my node. So if you see the pod IP of NGINX1, you have to route it to me, and I will give you the answer. So once this is all initialized, can you check if it's up yet? Of Yep. Very good. Yeah. So and if you do
58:24 kubectl get node, it should say ready. Okay. So let's create a an NGINX deployment. Let's just create some pods on this. Well, we'll have to remove the taint from the from the control plane node. We or do we want to spin up a worker first? We can do either. Yep. What about the what about the thing? I mean, we can add the worker. Yep. K. And we want to create I don't know. Run kind of x. Yeah. Test dash test dash image. Yes. K. K. So the image is coming. And let's see if it gets assigned an
59:21 IP address. Can you do dash o wide? And we can get Okay. So we see now our pod has a public IP address. However okay. We should be able to reach it from this node. So if you curl it, it should work. So we have to put it between brackets, the IP address, square brackets. We should be able to get yeah, that works. However, if we try to run it from any of the other nodes, which we don't have well, we have them. Or from the outside, we will not have a route to this node because there's no way for other
1:00:00 Announcing Kubernetes pod IPv6 addresses with BGP
1:00:06 people to know that this pod is running on this node. This is where yeah. Let's jump on to worker one then. Yep. So we have our admin mode on the top. I'm gonna have to fix it. I have to fix it. We have a key. Okay. So if we copy this curl command, you're saying that's what fail and that's because we are not advertising this address. Right? Yeah. You missed the square brackets. So nothing happens. Right? There's no route. So now what we're going to do is we're going to teach Calico about how the network infrastructure of Packet looks
1:00:54 like. What Packet looks like is every node, every device that you create will also have a gateway address. You can also see this in your Packet's in the Packet's screen. And the gateway is the address of the router you talk to. And this means we'll have to tell this address, hey, these pods exist, and they reside on me, and I will be able to resolve this IP address for you. And this we do through BGP. So we'll set up a BGP session between Calico node pod and the packet router, and it will then start telling the packet router, I have these
1:01:36 pods. You can contact me for this pod. So that will be the next part of our party trick, I guess. We can again go into my repository. And you will see a file called bgp peer. Yaml. Yep. Yes. And it's templated, so we'll have to fill it in a bit. So the first step is the BGP configuration, which we can copy paste. K. And this will have to apply with Calico CTL instead of kubectl, by the way. K. Alright. Yep. Yep. I go. Mhmm. There we go. Okay. So we want our server side. Okay. So let's leave
1:02:36 that out for now. This will set up later. We can just remove those two fields. I will we'll we're gonna edit this file later and reintroduce them as a party trick, but we won't need them for now. So you can just comment them out. So let's just take in what this all says. So what Kali code does by default, if you install it on an I p v four network, it will create an overlay network, and it will use BGP as well, but in a node to node mesh, as we call it. So every node will talk to every node and
1:03:19 use BGP to tell each other, I have these pods. So it's like a a mesh network. So node a will tell, I have the NGINX pods. Node b will tell, I have the, I don't know, the Alpine pods. And but we don't want this behavior because we have a router packet at the top of a rack, and we can just tell the router where the routes are. So we're going to disable the node to node mesh by setting node to node mesh enabled false. And then we're going to later configure Kali code to directly talk to the router.
1:03:52 And so this means that all the traffic will be reflected through the router from nodes to the other nodes instead of going through an overlay network. And this this is also the reason why we don't need to have some kind of overlay network, but we can just use a flat address space because we can bounce off all the routes between the pods through the packet routers. So this is why we have this node to node mesh enabled false. It's enabled through by default, so we set it to false. So can we apply this configuration using Calico CTL?
1:04:28 We can try, but Oh, yeah. Wait. Yeah. We have to do two things first. We have to explicitly set the kubeconfig environment variable because otherwise, calico gets angry. And then we set this to your KubeConfig path. I think that's already set because we can do it. Yes. But And we have to set export datastoretype equals Kubernetes. This is because Calico can run-in two modes. You can either store all the networking information in etcd directly. And this is because you can also use Calico on non Kubernetes nodes to handle routing. Or you can store it in Kubernetes directly,
1:05:23 and we'll use custom resource definitions to store everything. Oh, cool. Okay. Yep. So Now I can run c t l apply f and then our file. Yep. Oh, I'm sure I installed you. I did so too. I saw you install it. Oh, maybe not on the admin no. Not on the admin notes. We installed it on your the other box. Yep. K. So, Carol, not Hey. Cool. Okay. So now we're gonna set up Calico to talk to the packet router. So if we go back to my file, you will see a BGP peer file, BGP peer snippet. Just copy one of them.
1:06:37 Yes. We don't need the the template stuff. Just yep. That's enough. Yep. So I have a little template that generates it for every node in your packet project. So this will be the the host name, admin. Then this will be the address of the packet router, which we can look up in And of course, if we did this all nicely, we would do this with Pulumi and get the attribute out and then link it all in. But this I'll leave this as some if you can send a PR to my projects to convert it to Pulumi, I will
1:07:21 accept it. So if you go to the admin node I will definitely automate all of this. No problem. Yeah. So you will should see the gateway. Yeah. It's okay. Right? Yeah. And then this AS number, this is so this is how each router identifies itself in BGP as I understand it. People now say, you don't know how this works. I don't know how this works. I just tried it out and it worked. And so this is the the identifying number of the packet router. As long as you didn't select enable passwords when you set up your packet
1:08:03 projects, this should be enough. Otherwise, we also need to provide the password of the router. But I don't think you did that. Right? No. No password. We are in the middle. Yep. And the last field is a node selector. So this will and and usually, when you have our on prem, you will have one router, and many nodes will be talking to this router. Right? In in the packet clouds, each node gets assigned its own distinct public gateway. But usually, you'll have, I don't know, 20 nodes talking to the same public gateway. And this way, you so you
1:08:36 can use a node selector syntax here to, for example, say, all nodes should talk to this router, or, I don't know, all nodes in Rack 1 should should talk to router a, and all nodes in Rack 2 should talk to router b. And this way, you can describe what your topology looks like in your data center. But in the case of packets, every node has its own router, and it talks to it individually. So we'll have to create a BGP peer object per nodes that we add. So any questions about this or things that are unclear?
1:09:12 No. I think that makes sense. So we're just we're telling this yeah. You're saying if if we add worker one and two, if we decide to design that work, then we would just duplicate the style, changing the node here. Right? The node name. Yep. Yeah. And the peer IP also. Because every node will talk to a different gateway address in packets. So if we apply this Okay. Can you now type sudo oh, no. Yeah, calico node status. Calico CTL node status. So now we can see that it has established a connection with the routers at Packet
1:09:59 and that this connection is up. And this should mean that Calico is now announcing where all our pods are. So if we now go to our if we now curl it, it should work, I think. It has woo. And if it will even work from my computer. So if if we want to do a party trick, you can send me the link to the pod in the chat and Here. And if I go to it You can share your screen too if you wish, you wanna show it off. Yeah. So let's share my screen. Okay. I'm sharing my screen.
1:10:52 Yeah. We're now switched over. Here we go. Look at this. There we go. All the way from a pod in your network through the packet routers to my house in Germany with no overlay networks. Okay. That's pretty cool. That's pretty cool. Right? Yeah. Yeah. I'm impressed. Okay. So do we want to add another node to our cluster? Because the next cool party trick that we could do, if you want, if you still have time, is we can set up some load balancing and have a service that we can expose to the outside world. Yeah. I definitely wanna see this this service
1:11:16 Announcing Kubernetes service IPv6 addresses with BGP
1:11:32 stuff. So let's let's do that then. Yep. So but, yeah, we can do it with one note, but it's not that interesting. With two notes, I think it's it's cooler. Right? So if you We need our k. Maybe the end. Right? Yeah. But we're gonna write a join configuration instead of an in its configuration. But you can find that again in my repository. So You've done all the hard work. I don't have to. Exactly. So you can find this over there. Yep. Perfect. Alright. So I'm gonna paste this, like, the code and move presentation again.
1:12:18 Mhmm. Close that. I'm back over to my terminal, and we will create a content panel. We can remove this. Yeah. And what did you remove just now? Wait. Can you I think we removed too much. No. Yeah. That that we can remove. Yes. Correct. Good. That syntax is a bit weird. Right? Yeah. Certificates key can go and control plane can go as well. Yep. We can move the volume that we don't need, and then we need to add our address. Right? Mhmm. Yeah. So this is the address. Very good. Okay. So Worker 1, the B C P 6 address.
1:13:12 But we are on Worker 0. Right? It's not Worker 1, are we? No. We're on Worker 1. Okay. Good. There there is no Worker 0 because it wasn't automated. Well, it was automated, but I didn't add an increment on the tenth or anything. Yeah. How do I get the join token again? So with the print Yeah. There is some print command for this to get a new one. Yes. I think it's cube a d m token generates. No. This will just generate I think we need to No. Great. There we go. Yeah. But that just
1:13:56 generates a token. It doesn't store it. So that's not enough. Should I just follow-up and find the first one? Yeah. And otherwise, we need to rerun a certain part of the interface. Eight. Kubeadm generates new Okay. Token. I will just ask You found it? Yeah. Yep. Yep. Okay. So we will have to set so we can do the token and set it. If we are good citizens, we also set the discovery token c a cert hash. But I just have unsafe skip CA verification now. That also works. It's not completely unsafe. So it's only unsafe
1:14:49 if somebody knows what your Bootstrap token is. So if that leaks, then somebody can impersonate the control plane. But we can just skip it for now. It's not like anybody can see this token right now, right, on the stream? Oh, wait. But that's fine. Yeah. Okay. Anything else I have to change here? No. I think that's it. Oh, wait. I see a typo. One sec. Open it again. First line. There's a space too much. Yep. Perfect. So now we do kubeadm join dash dash config. Yeah. And you can install it again, though. Because we've always thought on it. I don't
1:15:36 know which. Really? I should have done the user data in advance, but I will automate this. Yep. And you'll also have to install Docker, disable swap, and set this forwarding rule. Got it. So stop Docker. Let's pull up the echo one command. Exactly. And I can manually do the other two commands. So what's that? So we wanna do with this control, docker, and enable docker service, swap off. I'm assuming the device will be the same. It was too. Was too. Yep. Echo. Got it. Yep. And I can do it. Be the end join onto convo dot level. Mhmm.
1:16:38 Copy that. And, no, wait. I did run this. Right? Yeah. At install. Oh, no. Install. I'll just run all of them. Maybe it got confused because of sudo again. Or no? Oh, well okay. You wanted to Yeah. This is working. Oh, maybe I didn't know that. Oh, no. I installed Docker. Ah. Mhmm. So let's just confirm what I called the local config, config dot YAML, the BDM join config. K. Unknown field bootstrap token. Interesting. Oh, it needs to be indented once. Yeah. Bootstrap token needs to indent. And then let's see. I think we made some
1:17:44 a little typo there. What does it look like? Oh, yeah. It's good like this. Yep. K. K. So up here, I'm just gonna run the that notes. Hey. It's worker one. Yeah. It's not ready currently because it's still starting up the Calico nodes, probably, the daemon. So it runs this as a daemon sets on each node, and it will take a little while to come up. K. We can try that with a watch, wait for the sales to change. Yep. So what we're gonna do now is we're gonna run multiple engine x pods, expose them with a
1:18:31 service IP, and use that to do load balancing. Is that correct? Yep. Exactly. So let's first delete our NGINX pods and create a deployment instead so we can so we can do create deployment, and then we do, I don't know, replicas 10 or something. I'm really looking forward to that new generator on this kind of oh, I run engine x, and then it's engine x, right, both. Right. Yep. And now we can do and hope and if we do a wide, we'll see that they get scheduled, hopefully, across the cluster. Yep. And we just wait on two more.
1:19:28 Yeah. So you'll need to download the image on the other node, probably. Or I'm gonna see the watch one and then stop the installation. But do we still need to when we were looking at the Kalicool, we need to add our BGP here. Is that right? Yep. Exactly. But we so we'll also have to add the worker one. Yep. So we can just add another element to the list. Yeah. I think that's essential. And and this, of course, again, smells like templating and automation. But So need it's IP address, but also the gateway. So Oh, only the gateway you need. Only the
1:20:27 gateway. Okay. Yeah. It's four. K. We can apply this. Yeah. And now on the worker, we can do Calico CTO status node status. So the thing is you have to run this on the node itself because it talks to the BIRT daemon directly that's running. So BIRT is the daemon that runs inside the calico node pods that acts that talks to router. Okay. Look at this. It's not healthy. Let's look at the pods in the Caliper system. The images? I don't know. But something is off. So we're still waiting on so that's not what I don't think is healthy yet. Right? Yeah.
1:21:38 So there are a few can you look at the pods in the Calico system namespace? Are they all running? So there's one crashing. You see? It has been it has crashed five times in the past three minutes, so it's not very healthy. Yeah. Both the worker one parts are failing. So let's grab the logs. Yeah. Let's see what's up. Is where we go off script. Oh, the namespace. Yep. K. What is the error? It says successfully loading to config. I think it crashed. Yeah. Can you look at the Calico note one? The typhob part is less interesting.
1:22:46 I don't even know what it does, I think. So let's do a right. Bring that. That shouldn't be on it from there. Ah. Failing. Or it's not ready. Okay. But why not? Oh, look at this. No such file directory node name. Oh, we didn't modify the result.com. That might be related, but not sure. But Mhmm. And we also have an error here saying that says node name failed just like this. Yeah. This is all a bit suspect. Yeah. Directories. Yeah. I'm not sure if this is a directory inside the pod, the thing or not. K. Can
1:24:18 No pressure. Can we look at the logs one more time? Maybe it tells more now. I may have to delete it at the store and fresher back up. And catch it quickly. I think you know we're now looking at the wrong one. This is the healthy one, I think. We need to have the one on worker one. I see what's going on. You see the IP address? Oh, no. Wait. That's okay. Never mind. Yeah. There's something fishy here. And why is it got an IP v four address? Exactly. So I think I know what we did wrong.
1:25:22 You say we, but you mean me. Right? Well, no. We we together. Can you okay. Yep. So this usually means so we have to, in our kube ad m config, tell the worker what their IP address is. If you don't do this, it will we did this. No. Because I was going to update this, and you told me we didn't have to. So it was your fault. Oh, but it is. It is. Interesting. Let me think. But, yeah, something is going wrong there, and it's auto detecting the wrong IP address. And this is why it isn't
1:26:08 healthy. Can we do a QVDM reset on that node? Yeah. Like this? We can. But you will have to kubectl delete notes manually from a Yep. Afterwards. K. Now shall we where's my BGP? Oh, no. We don't want the panel yet. Okay. Shall we just try this again then? Yeah. Let's just try it again. I'm a bit confused, but it's okay. Oh, you see? I see the error at the top. There we go. Unknown field, Kubelet extra arcs. Uh-huh. It has to be oh, yeah. Add two spaces in front of Kubelet, extra arcs. No. Yeah.
1:27:09 No. No. No. It has to be inside node registration. So yes. There you go. So it didn't know what its IP was, so we just assumed I p v four, which is the wrong one. Right? And then and this is the part that's not in the documentation, by the way. I I had to figure this out the same way as we did now. So, like, nowhere does it say that you need to set these fields on the cubelets. It just says. Yeah. K. So now it should be in a better state. Let's just take a look at part of
1:27:46 the system. K. There we go. That looks better. Right? It does. So if I run and get pods, I should see all the engine x's now running, and we should all have an I p v six. Cool. Yep. And we have a service. Right? So did we already add the BGP peer for this node? We did. Right? We added a BGP peer for the admin node. Yes. But one thing we kept empty was the service CIDR. It's here. Yeah. So I guess that seems to be a little. Yep. Yeah. But let's take one step back
1:28:26 first, though. Let's just first check everything. Can you do Calico CTL gets BGP peer? Just to make sure. Yes, perfect. Yes. So now comes the cool part of the of this thing. Indeed, in BGP configuration, which you just opened, we can also announce the service CIDR. So now we're only announcing routes to our pods to the world, but we can also announce the cluster IPs of our cluster. So we have to set this to the same thing that we put in the kube ADM in its configuration. We'll see service Yes, exactly. Yes. And service external IPs, we can leave.
1:29:27 So you can this is useful. You can also manually assign external IPs to services if you want to. And then they have to be out of this range, and then Calico will also announce them. But we don't need that for now. So if we Calico CTO apply this, k. If you go to packets to your packet console now, and you go to network BGP, and then update status and then refresh the page. Here, we can see all the routes that the nodes are telling to the package router. So if we click on worker one, for example, or admin,
1:30:27 you will see it is announcing the service CIDR and the pod CIDR. So the cool thing is, is that both worker one and admin will announce the same service block, and this will cause the packet routers to automatically load balance between the two nodes. So you get a a load balancer for free, basically. So when the outside world says, I want to reach a Kubernetes service, then the packet router sees there's two entries for it. It's either master or worker one, and they will go to the queue proxy of either of those, and then it will
1:31:11 go to the correct pod. Yeah. And you'll also see that the pod CIDR is different for each of the so the server CIDR is the same because we want to be able to load balance this. But the pod CIDR is different. So you will have a subnet for all the pods on the master node, and you'll have a pod CIDR for all the node for all the pods on the worker nodes, and they will be disjoint. So this way, when you try to reach a pod Yeah. You see that they're different? This way, the outside Internet knows how to route to
1:31:56 the correct node to reach the correct pod. Yeah. So Okay. We can try this surface now that we created. We don't have one. So Oh, yeah. We So we can do two CTL expose. Oh, yeah. I guess it's okay. Yeah. And then NGINX. Yeah. Dash dash port 80, and then I will just port. Oh, yeah. Exposed deployment. Yeah. Okay. Okay. And now if we go and curl this address, we should get low balanced access to to our NGINX service. We could verify that by looking at the the pot logs, for example. But We can change that.
1:33:04 So image. Options. No. It's info. Oh, what's this? It's from the open fast protect, but it's a function that returns information about the pod that is running on over HTTP. Cool. So the port number might change, but I can fix that. It looks like that's running. Let's just run edit service. And I can never remember which way these are. So 80 eight is the target port. There we go. We have the host name. Cool. Right? Alright. Is cool. I like it. Yeah. But there's so there's one more thing that we can tweak. So as you see
1:34:05 in the the routing table that we are announcing to packets, we're announcing the entire service range. Yep. Right? The whole. Right? Yep. And that's okay. But sometimes, there might be pods that are not running on a on worker zero, but are running on worker one. But in this case, it will even contact worker zero even though it's not running any pods. And it will then use kube proxy to make this extra hop. So this is can be a bit detrimental for performance sometimes. So because it will need an extra network hop to reach the pod sometimes.
1:34:47 What it does do, it gives you very equal load balancing, which is very nice. But we can also configure Calico to only advertise nodes that actually is running a pod from that service. We can demonstrate this by maybe making sure that there are only pods running on one of the two nodes. Yeah. And then we can show the difference in in what happens with the routing tables. So Okay. So we want to edit node admin. Let's add but we can just. We can just taint it again. Right? Or some Yeah. But we just do a copy and
1:35:40 paste in. No. At the deployment. Let's do anti affinity. Officer. Yeah. Come on. Just give me the don't know. Oh, yeah. This require during scheduling, ignore during I always get very confused by this stuff. So let's grab this and add this to our final. So where's our spec? Alright. Case is gonna be weird with it. So I wanna add and then two. Okay. Into an actual YAML file. Let's go. We want that. And we're we're gonna go I think we could just do a host name. Right? And we'll just say we don't want to schedule
1:36:55 on admin. What is this key in this case? Yes. So very good. We need a label. Could also so at the beginning, we tainted our we removed the taint from the from the control plane. Right? Maybe we can add that again so that it doesn't run any workload stuff. Yeah. We don't have a kube config on the workers, so that won't work unless Let's just I know that this looks great. So I could add the master tape again. I guess that might be quicker. Kubernetes master. Yeah. There's no schedule thing. Right? Can I add? No. Spoke past it.
1:38:05 Yep. When the toleration goes on the well, yeah, there we go. Yeah. I'm looking at this YAML component. That goes on the pod. It doesn't of course. I do that. Admin. I get pods. What is key one value one? Is that do we need that? I think it is confusing us again. Yeah. That's that's not gonna be the default. So if we take a look at anything running on let's get something from our cube system namespace that's running on our admin node, which will already have the toleration and then I'll copy the labels. So I've known.
1:39:15 Let's take a look at here. That's the admin. Keep the system. Add a pod. Yeah. I'm on the test. I'm gonna make that short call. How am I feeling? So I I I I have a quicker idea. How about we scale we scale the deployments to to one pod, and then it's only on one node? Right. Yeah. That would be good. This is me getting creative. K. Good. The one I kept is on the app, man. It's the latest. Oh, I guess that's fine. Right? What is fine? Because it it's running on the admin note, but we're gonna change it
1:40:28 so the service publish doesn't publish the other note. Right? Exactly. So this is great for demo purposes. But okay. If you now look at the routing table, it will still On the packet? On packet. Just on the interface. So we still see that both nodes are advertising the service the service center. But we can configure Calico to only announce the nodes that actually run the pods. So we can do this by editing the NGINX service. And we can set this by setting the external traffic policy to local. But there is a catch to this. This
1:41:19 only works on node ports, type node port. And this is just a Kubernetes API quirk. We're not going to use the node port, but we need it anyway. So and then we can set external traffic policy to local. We have type cluster IP below still. We have to remove that. Yeah. Okay. And if we apply this, so this should still work. We can ignore the node port. It's only there so that we have access to this traffic policy thing, and it's maybe something that should be fixed in the Kubernetes API. So Kubernetes doesn't really so cluster IPs being exposed externally is not
1:42:08 something that was being thought of originally, I think. They always thought we'll use external load balancer objects for this. So you can do type load balancer, and you'll get something from your cloud provider. So here, there's a little bit of an API mismatch. But now if we go to packets and we refresh on the BGP page the the routes, so we press update now. Has this update now something that can be done programmatically? I don't think so. So and because they also ask us nicely to only do it every five minutes. So the the routes are being updated. This
1:42:54 is just about the interface getting the information from the router and displaying it to you. So you don't need to press this button to update the routes. It's just to get the information into the interface. That's it. So now we should see that a let's see if this now works. If you go to the nodes that is running the pod. Oh, yeah. Exactly. We see that it now announces a a slash 128. So it says this specific service IP is exactly on this node. This is and if you go to the other one, it should not be there.
1:43:41 Okay. See? So this now will cause it only to get routed to that node, and it will never go to the other node. But that just reduces the extra hop then where it doesn't have to go through IPVS or the Q proxy or the point that Exactly. Yep. Yep. So it just avoids this actually does load balancing itself as well. Right? So if your your pod workloads are not evenly distributed over your cluster like we have now, all the NGINX pods are on admin node, right? So it's receiving all the traffic right now. That could also be the case. So if
1:44:18 your pods are not spread evenly, and this is also not something that Kubernetes gives you, right? It doesn't give you even spreads. It does a best effort thing, but it might come into cases where resources aren't spread around evenly, then removing this extra hop through q proxy can give you an even low balancing. But but it does avoid this extra hop, which is nice. And Is there any penalties, whether it be performance or from packet state how many groups can be published in that that way? Like, if I have a relatively large cluster and I need to
1:44:55 with thousands of services and they're publishing closing the group, is that is that a challenge? So I don't know what the limits are. I'll there will probably be a limit. And so Calico has some pages about designing your BGP infrastructure. And usually, what you'll have, you have routers that announce the routers that announce the routers. You kind of have a trickle down system to reduce the routing tables. Because usually, you do not announce 10,000 routes to one router. It will get a bit confused and it might drop routes or whatever. So I don't know what the limits are,
1:45:37 to be honest. Is something I haven't found in the documentation either. But if you do bare metal yourself, then Calico has a very nice tutorial explaining how you should set up your infrastructure and your racks and how we there are some different trade offs that you can make in terms of network design. But that's dark magic I do not yet understand. But yeah. So is are you using a Calico here today because they're the over CNI offers this or the one that you're just more familiar with? Like, do other CNI implementations offer the same functionality?
1:46:16 I don't know. So I think Calico is the only one that, like, allows you to do this. So what we call this is, like, a pure layer three network. Classic one where we use BGP for announcing routes. And also, you log into one of the boxes and you type in IP route, you actually see all the routes listed. And it's very easily debuggable using so if you do IP dash six, you have to add a dash six, otherwise it gets angry. Like, you'll actually see like this pod's IP goes through this interface and all the other stuff has to go through
1:46:54 the gateway for your default route. So it's a very classic way of setting up networks, which also gives you, like, very familiar tools to debug it for, like and as soon as you have overlay networks and stuff and a lot of IP tables rules, I think these things get less transparent. And so yes, I think Calico is the only one. No, wait, there's another one. KubeRouter also does this. So there's also KubeRouter, which also does BGP routing. And I think you can also combine that with Cilium together, but I haven't tried those two out. But I think in terms of having
1:47:35 this BGP by default approach, I think Calico is probably the most mature option out there. Like this is the thing that they advertise with. Like this is what we do. We do flat networking. But I know that, for example, Silium has some other cool tricks, like they have this eBPF data plane that you can add, which avoids having to install Kube proxy. And I think Calico is also working on something similar on the eBPF data plane, but it I checked, and it doesn't work with I p v six yet. So I couldn't try it out yet.
1:48:12 Wait. I have a a nice session planned for next week with someone from the team. I'm looking forward to learning something. Yeah. Cool. There is a question if you're feeling brave. So Yep. Has asked, when do you recommend to use reflectors? So this is also about, like, scaling, right? So I must say, I don't know a lot about BGP. This is me learning in the past few weeks and trying things out. When do you recommend it? From what I understood from the Calico docs is when you want to like, usually, Calico sets up a node to node mesh, and all the nodes
1:48:53 talk to each other. And that will not scale infinitely. Right? And instead, you can determine some certain nodes in your cluster as you act as the router, I will reflect all the routes through you so that you don't have this n times n PGP connections to announce all the routes. So I think it's a matter of if your cluster is starting to scale to thousands of nodes, you will have to add these reflectors. But yes, I haven't had a cluster with thousands of nodes yet, so I don't know. But the there is a page on the Calico documentation called
1:49:32 Calico over IP Fabrics, and it explains all the different trade offs you can make in setting up your Calico network, like whether you want a node to node mesh, whether you want route reflectors, whether you want this trickle down routing. But So, yeah, I I actually think the only use case is to just scale this note to note mesh. But in our case, we're not using the note to note mesh at all. We're using the packet routers to as route reflectors, basically. So yeah. Alright. Well, my brain is now officially fried. Yeah. And there is a a lot, I think,
1:50:12 I need to to learn and play with in that space. And that was a fantastic you know, just walking through this step by step and actually seeing how to disable, like, before and turn on IPv6 and configure the peers. It's all very valuable and very useful. So thank you for taking the time to to join me today and go over all of that. I will publish the preliminary automation in the next couple of days. Is there anything you would like to finish up with before we we finish off for the day? And I'll let you get back to your
1:50:40 lunch or work or whatever. Well, one thing we didn't cover at all is, of course, security. So this might be a fun right? You you everything is public now, and that's probably not what you want. Like, I don't want all my cluster IPs to be publicly reachable and stuff. And, yeah, that's something we haven't configured yet, but this is something you can do. So Calico has support for network policies, which you can describe which pods can talk to which pods and stuff. And this is something you should definitely set up after you set up an IPv6 cluster because
1:51:17 everything is publicly routable, right? And this might not be what you want, and you want to close the fortress a little bit. Yeah. Yeah. But that's an exercise for the reader. Yeah. Either that or another two hour stream eventually in a few months or something. But we'll see. Yes. So the the policy stuff is security stuff. Yeah. Yeah. I can imagine. Right now, everything is is public, so I'm looking forward to shutting this customer down before it gets to there. But Yep. You also said at the start that you work for wire, and I believe you
1:51:50 may be tiring just now. Yeah. So we are hiring for a operations position. Experience with Kubernetes would be very helpful, but not needed per se, because we are so so WIRE is end to end encrypted chat platform, collaboration platform, like a Slack competitor. And we also run WIRE instances on premise at customers. And we are migrating our old cloud infrastructure to our new cloud infrastructure, which is Kubernetes based. And so we need people who have knowledge about on premise hosting and all the dirty nitty gritties of people other people's shitty networks. And we need people to help us migrate to
1:52:37 our new cloud infrastructure, so we're looking for people for that. So, yeah, feel free to check out jobs.wire.com. And then yeah. There's a job ad there. Yep. Cool. Alright. Well, honestly, that was really insightful. I learned a lot. So thank you very much for taking the time out to join me again. And I hope I hope speaks to you all then. Yeah. See you around. Bye. Ciao.
Technologies featured
Meet the Cast
Stay ahead in cloud native
Tutorials, deep dives, and curated events. No fluff.


Comments