About this video
What You'll Learn
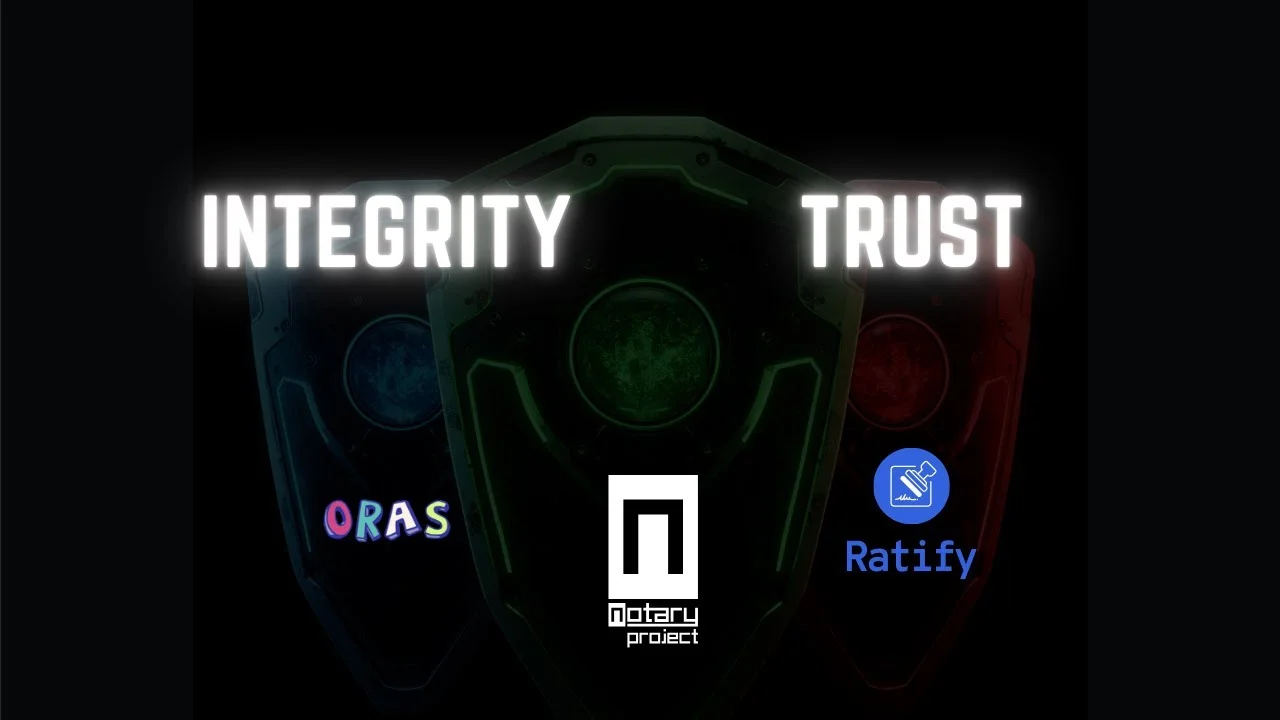
- Sign container images and artifacts with Notation using trusted certificates.
- Store detached signatures in OCI registries alongside images with ORAS.
- Enforce admission-time trust checks in Kubernetes with Ratify and Gatekeeper.
Yi Zha from Microsoft demos how Notary Project, ORAS, and Ratify secure the container supply chain on Kubernetes: signing images with notation, storing signatures as OCI artifacts, and enforcing trust at admission via Ratify and OPA Gatekeeper.
Full transcript
Generated from the English captions. Timestamps jump the player to that moment.
Read the full transcript
1:48 Policy set, Hello, and welcome back to the Rawkode Academy. I'm your host, Dave Flanagan, also known across the Internet as Rawkode. For today's Rawkode Live, we are taking a look at not one, not even two, but three different projects from the cloud native ecosystem to help you improve your security posture and container image pipeline. Those projects are Notary, OraS, and Ratify. And joining us today, I'm pleased to welcome Yi from Microsoft, a maintainer, or two of these projects, Notary and Radify and a contributor to OraS. Welcome Yi. How are you? Hi, David. I'm good. Hello, everyone.
3:28 For anyone who has not met you before, could you please give us a little bit of history, flavor, context, and tell us all about yourself, please? Sure. My name is Yi. So I'm currently senior product manager at Microsoft. My main focus is on the container's secure supply chain. I'm also the project maintainer for the CNCF project, notary project, and the RADify project. And also, I'm spending time working on the ORIS project. Yeah. So my main goal is to build in the solutions and the tools to help users, customers to secure their supply chain by using
4:16 authentic content, their images and other effects. All right. Yep. Now, maybe a little bit of a broad question here, but let's open it up to some conversation. Aren't if we're shipping containers to to a Kubernetes project, aren't we secure? Like, what is the state of security today if you are just deploying your first pod and container image to a Kubernetes cluster? Yeah, I think it yeah. So so today, in cloud native world, the Container Warehouse application is where we built it popular, especially the Kubernetes and the different distributions that your vendor provided. So security remains
5:06 the very hot topic, as you know. Recent years, there are many cyber attack on the software supply chain, especially with the with the growing of the open source projects. Right? So malicious code vulnerabilities could be injected into those open source projects, and those could be the dependencies for your container images that you are going to deploy or use in your pipeline, in your Kubernetes environment. Yeah, I think that's the main topic we'll be able to talk about today about the security. Okay. And the three projects that you're going to show us today, they're all CNCF projects.
5:53 But what are they? Can you give us the kind of TLDR on what is ORS, what is notary, and what is ratify? And if you're gonna cover this in your your demo and stuff, please feel free just to, like, say, let's move straight to the demo. But if you wanna give us just the, you know, the thirty second pitch for each. Yeah. Sure. Before I start to intro those open source projects, I want to talk about the more about the backgrounds and also a systematic way for securing the software supply chain for your containerized workloads.
6:29 Actually, in the, to superior, container supply chain, there are different aspects you needed to consider. For example, once how do you scan your container images and you will receive some vulnerability reports, right? How do you want to patch your container images? How do you want to fix your application, one of our codes. Those are related to the one of the management. So today, we will talk about more about the authenticity and the integrity of the contented images That means that so as a developer when you want to use some, for example, base images or utility images,
7:19 you may want to ask the questions How do I trust those images? Right? Well, that's where do those images come from? How do I trust those images that come from really the the company or the organization I trust? This is one question, and this is about the authenticity. Another question often asked by developer is that how do I ensure those images are not tampered with during the distribution because images move around the registries, right, from your SAS ID system to registry and to public registry or from public registry to your private registry, right, from public cloud to your on premise
8:05 cloud or even other cloud environment. So how can you ensure during this distribution? How can you ensure the images are not tampered with by the bad actors? So those authenticity and the integrity are the topic today. And in the container supply chain area, so I think the last KubeCon twenty twenty four in North America and one of the notary project maintainer, also my colleague gave a very good keynote talking about the whole end to end solution and the tools that can be used for securing the service supply chain. So I want to talk that process a bit because
8:56 later on, when I show you hands on, you will know parts that will be covered by those tools and what's the purpose to use that tool to achieve what go? Yeah. So in order Yeah. Yeah, please. Well, I just want to, you know, make sure I fully understand the problem statement here. Right? So when we're talking about patient images around, like you said, you go from public registries to private registries to inside of your cluster. Those are just bytes and bets being thrown around the wild internet. We need some sort of, we can't trust them right away. We need
9:36 to be able to prove that we trust them. ORS, I'm not super familiar with any of these tools. So anything I say wrong, just jump in there and say, no, no, that's not right. ORS is a tool that we can use to push and pull from different registries to the best of my knowledge. Now, when I say let's run and I'll just pick a random project here, let's say Valky another CNCF project. I wanna run this in my cluster. I say, I wanna run version one in my manifest, the kubelet and container D are responsible for
10:07 pulling that and putting that in the cluster. If I pin that to a SHA, like say instead of saying V1, I just use a SHA. How secure am I at that point? And do I still need to bring in other tools such as Notary and Rettify? I want to understand where that gap in my knowledge is to a certain degree. Yeah. So I do that AORUS is the tool to manage the OSA artifacts in the OCI compliant registry, but here to the OCI standards. So for folks who who doesn't know the OCI, OCI means Open
10:45 Content Initiative is also Linux Foundation projects that to provide a standardized way to managers' images, artifacts, content the runtime, and how to distribution for in a container world. That that is their goal. So ORS is the tool that managers OSA identified in the container OSAI compliance registry according to the OCI standards. So that is the purpose for AURAs. And you mentioned that the share, the digest of images, right? That is a very good point because the digest is the unified way to identify an image. But you can use the digest to identify an image, but how do you know that the
11:43 images is coming from a trusted source? Right? It could be yeah. The digest, no one changes, but the image is actually coming from malicious hacker. How do how do you know that? Right? So that is the purpose for the yeah, we are introducing the product now, our project now. That is the purpose for the Notre project. The Notre project, the mission is Notre project is actually a set of specifications and the tools. And the mission of Notre Project is to use a standard way across multi clouds to provide the tools, solutions for users to ensure integrity
12:27 and the authenticity of their images and also other artifacts used in the contender world. Yeah, so I'm by mentioning the other artifacts, so contender images are the main one, but it could be some other artifacts, for example, ham charts, right? Ham charts are very popular for the Kubernetes. Yeah. So using another project, you can using the by using the digital signature, you can ensure the authenticity and the integrity from a producer point of view, you can cite from a consumer point of view, you can verify it to ensure it's really from from the trusted source and then not modified
13:11 during the distribution. Yeah. Yeah. I mean, the digest approach is obviously what we've been told over the years is the best practice, but the developer experience of that is not great. I can honestly say, I don't think I've been to a company or worked with a company where they've just penned to digest and they're manifest. It just never happened. And I feel like, well, it's best practice. We need to find a way to make that easier to consume. Notary is one of those projects that I say really does fill in some gaps there because it allows you to break in what as
13:43 we're going to see, allows you to bring it into the loop and still get the convenience of tags, but still have some sort of trust and integrity pipeline that says, okay, this is the thing I want to run. Now what about ratify? We haven't mentioned that yet. Where does that fit into the puzzle? Yeah. Ratify is a very flexible verification engine. It's built on top of extensible framework that you can plug the different, wildfires to verify, reference artifacts to ensure, the artifacts, is secure from various aspects. For example, second issue we just talk about is to
14:28 ensure the integrity and the authenticity, right? Ratify can validate the signature for example produced by the notary projects, but there are some other artifacts for example, we, I think at the beginning, I talk about the vulnerability management. Right? So, for container images, you can ensure they are trusted, but how do you know whether they contain vulnerabilities? So Ravodify can what verify the vulnerability reports or fundings associated with that content images. For example, if your company you you have the policy that no critical or high vulnerabilities are allowed, Ratify can do that, with policies. And there
15:20 are some other, artifacts like, SPAM, software B of materials, So RADIFY can also validate, the artifact to ensure, the software are compliant because software have a, for example, have a different license, right? So RADIFY is actually the verification engine to validate reference artifacts associated with your contender images. But the goal is the same, to safeguard your contender security. And the Ratify currently working with OPAC Gatekeeper, open policy agent gatekeeper. Gatekeeper is the policy engine in the Kubernetes. So Radify worked with Gatekeeper to help secure your containerized workload deployed on the Kubernetes. Very, very cool. I'm looking forward to this
16:16 then. Alright. I think we've covered enough of the bases to set the stage, if you will. If you could now share your screen, I'm happy to hand over and get hands on and see the demo that you've prepared for us. Sure. Let me adjust my window. Yeah. Of course. Take your time. Alright. Your screen is shared. The font looks great. Take it away. Thank you. Yeah. So today, I will show you how to secure your containers' workloads, containerized workloads from end to end point of view. When I say end to end, it means starting from
17:17 your build, your container images and you assign your container images to generate the digital signature and those signature can be associated with your container images. And then later on, you'll want to distribute your container images to from your build system or CSID pipelines to another environment for the production usage. And on your production environment, I will demonstrate how to use Ratify and the Gatekeeper to prevent, deploy, untrusted images. Okay? So that's basically the process. So what I will do today, you can do that on your, actually, Windows laptop because I use Docker desktop to set up the Docker environments.
18:15 I use the WSL2 for the Linux environment and I download the tools from Notre Projects, Rottify, and Auras, and also, the Gatekeeper. So I will show show them. So basically, everything you, I will do today, you can do it on your laptop. Of course, if you have a Mac or Linux workstation, you you can also do that as well. Okay. So on the window you you see is the WSDL two. So I already downloaded Noteproject tool Notation, which is the CLI tool for sign and verify content images and other artifacts. So let me show you.
19:12 Yeah. This is the tool I downloaded from Docker project GitHub. By the way, I also prepared a README file, so after this podcast, can share it out so you can try them. And that README file is located on my GitHub repo if you you go to my GitHub using my name, y I v h a one, you can immediately find that. Yeah. I'll make sure that link is in the description afterwards as well for anyone watching Yeah. For the fact. Thank you. So this is the notation CLI. I also download the ORAS tool. These two are ready
20:00 to use. And for Radify and Gatekeeper, they will be deployed on the Kubernetes. I will show them later. Okay? So yeah, in this directory, I also have several files. I will explain them later on. The first is the Dockerfile. So normally, you will have this in your CICD build system. You will have a Dockerfile to build your content images. Right? This is just an example of Dockerfile. And then today, I will also, demo something different but more secure, and we will would like to promote, the usage in the near future for the for us, intend the images.
20:47 So, today, so for most, in most, solutions, the contender images needed to be pushed to a registry that signs the contender images in the registry, right? So that means the contender images after you build, you will push them from your file system to the registry. For example, you use Docker build and it will create images on your file system, and you use the Docker push to push those images to the registry, then you sign it. This is the way notation already supported, but today I will demo more advanced the usage. That's you build your container images, and then the
21:39 images are on your file system, right, before your you copy or push your images from your trusted domain, your file system to other, for example, registry or other file system. For example, we we have a some customer they are using Lgap environment right so you cannot easily just copy the images between the registries normally you will copy them as using some file transfer mechanism. So I will show you how to do that in a more secure way to distribute your content images. And at the same time, you can still have your signatures associated with your content images.
22:29 The digest will not change. Everything keeps the same as you just built. Okay? Now I will I have this Dockerfile. You can take this environment as your, for example, SICD system. I just use the command line to simulate the process. Okay? Then so let's first export some environment. Yeah. I will use my I will use the DocHarp to simulate the registry. It could be any registry, for example, public any other public registry you want to use or any private registry. I will give the name. Okay, and I will then start to build. Okay, I start a new Buildx environment,
23:36 then I will use the Docker Buildx build. I will just plan this later on. Yeah, the tag will be the image that the environment variable that we just set. So with this command, you will build the image in OCI image layout format. And for Docker Builder command, either we will generate a tarp or for the OCI image layout. For folks who is not familiar with OCI image layout, OCI image layout is also from the OCI image standard from the OCI community. It is the standard way for you to manage OCI images or artifacts on your file system.
25:02 So simply, you can think this is just a table, and it contains directory and the files. Will show you later. Just out of curiosity, if you mind, are you happy to take questions throughout? Is that okay? Yeah, I think so. So I don't use build X very much, but does Docker not build OCI images by default as the layout? If not, does it use something else? Or does this output just specify to do it as a tar file? Is that the main thing that's different here? Yeah. If you want to produce the OSA image layout,
25:41 you will use this command. This is the only command to support produce OSA image layout using Docker. Okay. Yeah. So normally, you just use Docker builds or some other commands that is build to the container images not in the OCA image layout format. Okay. Thanks. Okay. Okay. I think it is successful, although there is a warning. So this is the TARC work. So so let's use tar to extract it into a directory. Okay, choose the directory we just created Okay. Then we go to this directory. You see it is yeah. Actually, OSA image layout is just the files
26:55 and directory according to the OCI media layout specification. And let's check this index. Yeah. You will see the media type. You if you are familiar with the manifest of the images, the media type, and also you see the annotation, it is actually the image that we want to tap, right, into the the registry. And this is the tag, and this is the architectures. So basically, in the registry, they are similar structure. So that is the how do you say? That is the benefits of the OCA image layout because you can easily move from file system to any disk
27:50 any registry or even any other file system. Okay. So why there could be a question that why I needed to, because it is already a tab or a file. Why I needed to inspect it into a directory? Because another project, when signed the contented images, it will produce detached signature. Means detached signature means the signature is actually a different artifact. So if you store this signature in the registry, it will have a different manifest, but that manifest will have an association with the contained images so that you will know the signature is for which container images.
28:40 So I extract the the container images into this directory. Now I'm going to sign the container images, and the signature will be produced inside this directory as well. Okay. So before we using the notation tool to assign images, there's another important thing I want to talk about. Because when you assign content images, Notre projects utilize the PKI infrastructure, public key infrastructure. Actually, you need to have a private key key files and the certificates. You're using the private key for signed and then the images. And from the file point of view, they will using the certificates.
29:38 And that the certificates inside it it contains a public key and you use the public key to verify the signature and the certificate include any signer information. Those are the folks that you also need to verify you you should trust. So so this is the the basic knowledge here for for the DG signature. And actually, the keys and certificate are quite critical, right? If any malicious users get the private key, they can sign it, right? So to securely store your keys and certificate, you can use any popular key management system, for example, from error, error providing the error keywords,
30:33 If you are using the AWS cloud, you can choose the AWS Assigner. And recently, another project was adopted by Alibaba Cloud, so if you are in the Alibaba Cloud environment, you can choose Alibaba Cloud Secrets Manager. We also support HashKob Vault, but, it is in the R5 version, it's still an early version, so if, folks are interested into, this, pain management system, feel free to join the community, we can talk about how to enhance that. So today, for the hands on purpose for for you to easily try the sign and verification experience, I use self signed certificates
31:30 And actually, Notary Project two, Notation provide a very convenient way for you to generate a self a self signed certificate for trying the signed and the verification experience. So notation has the cert command, certificate command, in short cert, and you can use it to generate test certificates. For example, I generate for my company. You you can use any name here. This is what I choose, and you make it a default certificates and the keys so that you can use it easily later on. Okay, you see I generated the test key and the test certificate. Those are stored in the notation
32:35 config directory. Okay. And then you can use SERP lists. You can see this is the one I just created. The second one is what I test for the hands on today. Okay? And you can also check key using notation key command. You will see I also have a key for my test before this broadcast. This my company, this is the key I just created, and you see this star, it means it is the default key. So with that, we have the key and certificate created. As I just mentioned, in production, normally, you will store those keys
33:26 in a key management system. So today, those are the self signed key. They stored on my file system. Okay. To sign OCI image layout, actually, notation, currently, the feature in notation is experimental. So I needed to enable the experimental flag notation x. Experimental. Okay. That's correct. Then I can sign. But before I sign, I want to check, for example, just to show you that there's no signature for the OCI image layout. I can use notation list, in short, ls command to OSI layout. The layout I just created. Okay. So on the screen, can see that
34:39 this warning for experimental feature. And because I use TAC, there's warning as well. It is suggested to use the SHA, which is more secure because SHA is the unified way to identify images. But for the demo purpose, I just need to use the tag V1 and which will be shown on the doc later on. Will show you. You'll see these images identified by the SHA has no associated signature. Okay? This is before we sign. Okay. Now we have everything. We have a key, and we have a certificate which will be used later on for verification.
35:28 We checked the OCI layout. There's no certificate no signature generated. Now I'm going to sign it. It is very easy because I made the key default. Right? I I have set a default key. So I will going to set sign the OSAT layout, Net Monitor. Okay. Okay. It's very quick because it's all on my local machine. So successfully assigned these images. You remember this digest three forty seven. So if I can scroll up this image layout index file, see 3472, right? So it is the image we want to send, then we check whether they have signatures. I
36:31 use the same command I've got before notation list. Okay. You will see a very nice graph output. This is the container images, right, identified by this digest and that is the notary project signature, associated with this container images and it is, as explained before, it is the detached signature, Right? So it has its own manifest, and this is the digest for that signature. Okay? So we complete the sign. Till now, we have the signature. We we have the contained images on my file system. It is still under my trusted domain. Right? It is on my system. So imagine it
37:28 is your CICD system or build the system in a private environment or any public cloud host environment. It is on your environment. It is not in any other registry yet. It is on your file system. It is secure. Then we go to the OCA media layout, the directory. Let's check the index file again. You see they are something more. Right? So previously, you only see this metadata for the images in OCI image layout format. Now you'll see there's addition metadata for signature If you remember this is the digest for signature I scroll up a bit
38:23 You can see the same digest. So you you will see there are two manifests, and one is for the images, another is for the for the signature. And there are some other annotation. This is sample print is actually the sample print for the certificate. Because we use self signed certificate, there's only one. In production, normally, user will have a root certificate, intermediate certificate, and the signed certificate. So in production, you will see three. Okay? Okay. Then we completed the design process. We we have everything on my file Yeah. Yeah, please. So when you've signed that with the notations CLI,
39:17 you've modified the OCI layout image JSON artifact. Does that not change? No. Didn't. No. I didn't modify the image itself. I just add a detached signature, another manifest into the OCI image layout directory. So the image is still there under that directory, but I attached another signature, another separate artifact into that OCA image layout directory. It is similar like in the registry, right? You have your container image stored in the registry. It has its own manifest and the layers. Then I add another artifact, in our case signature, into the registry. It has its own manifest and also layouts.
40:16 So in the registry, you have image signature on your file system similarly under that directory, although the directory name could be a bit confusing because it used the image name, right, the the the repository name. So it looks like I modified the image, but actually not. Actually, that is just the directory for OCI image layouts. And under it, by checking the index, you see there are two different manifests. Right. Okay. Gotcha. Yep. Okay. That makes The digest is yeah. Digest is totally the same. Okay. Now I will copy the images using Auras. This is now the
41:03 Auras tool. Jump into the picture. Okay. Auras manager artifacts in OCI compliant registry. So Auras, in in this context, RRAS will copy the OCI image layout to a registry. For example, in the in in our hands on, I use DocHub for store the images. But in your case, it could be some private registry or any other private other public registry based on your cloud environment. And the good part or the beautiful part is that you see everything is actually directory and files. Right? You actually can make another table or other file transfer mechanism. You can
42:09 transfer it from your local file system to any other, for example, file system or storage using your own file transfer mechanism, your own secure way for transfer files. For example, if you have air gapped environment, you can actually copy the images and the signature from your file system, your build system, for example, to to a USB drive. Right? Then you use that drive to your air gapped environment you plug in. Right? And the the images and signature are the same, totally the same. So it can leverage your current file transfer mechanism, the secure way to distribute
42:59 your files or binaries as you did previously. And from that environment, you can, for example, use Aura's to copy the OCA image layout to the registry for production usage. So now what I will do today, I will skip the process on how you transfer these files. Assume that you copy these files using some file transfer mechanism and copy it to your production environment. So now I'm on the production environment. Okay? Then you can use ORA's tool. Actually, before that, let's use Auras tool to check whether there is the same image in my registry. I use DocHub to simulate.
43:56 So if you remember, let me check. Okay. This image is not fun, right? Okay. Now I'm on the production environment or the environment that I will propagate the images to my registry, I use OrasCopy. This means recursively. It means that not only the image, but also the signature associated with the image from OCI layout to Okay. It seems there's the arrow. Let me try again. I think Docker Hub may just have been having a wee moment. Yep. Let me check. Just a second. Because all of the layers are one rule. Yep. Let's try it again.
45:42 There you go. Yeah. Okay. If you remember, previously, I used this command to discover whether this image exists or not. Right? So let's check again. Okay. Now this image is is stored in the DocHarp, the same digest, you remember. And it also has a signature associated with the image. Okay. So now we yeah. We we have first of previously, we have everything securely stored on my file system. Right? Then I use the secure way to transfer images and the signatures to another secure environment, which will promote the image to production registry. Then I use Aura's command to copy from
46:40 the OSAI image layout to the production registry, I use DocHub for simulation. So you see everything is now in my production registry. Okay. Then we will go to the verification part. Okay. To verify images, actually, it depends. For example, it could be, for example, I produce base images, and this base image is stored somewhere, and then you will use in your environment to use that base images for building your own application image. Right? So in that case, the base image is actually consumed in a CICD pipeline system, so that you can use notation tool to validate
47:37 the signature of the base images to ensure they are trusted before you use them. Right? So this is one scenarios that you can validate the images in your build system, CICD pipeline. Another scenario is about the workloads on the Kubernetes. Right? So you build your connected images. In the end, you want to run them in the Kubernetes to provide the service to your customers. So that is the scenario that you will pull images from registry and then deploy to the Kubernetes. And in that case, we also needed to do some validation, verification to make sure those images that are
48:27 going to be pulled and the wrong are trusted. Right? So I will demo these two scenarios. To demo the replication inside CD pipeline, I will using Notation tool to simulate it. So normally, we have a currently, Notation tool has been integrated with GitHub Actions, Azure DevOps, and the FluxCD. And there will be more SAS AD pipeline that we plan to integrate. So if you are on the GitHub or Azure DevOps or FluxCD, you you will have a manager, the task manager, the access actions to use to verify the signatures. So today, I will use the Notation CLI
49:21 to simulate the process. Actually, for those tasks, they also integrate with the Notation CLI to do that, but provide the management experience. I will use Notation tool to demo it and show you the how Notation can trust an image an instant nature. Assume now we are on the CICD pipeline. In order to verify a container images, for notation, we needed to set up trust the store and trust the policy. Trust the store means the trust anchor, means who you trust. It is based on the PPA system. So normally, there will be a CAE. Right? CAE issued
50:11 a signed certificate, and those signed certificates will be used for assigned content images. Just now we demoed that using the self signed certificate to simulate this hierarchy. But in real world, you trust the SCA, your consumer, your customer, or image verifier, they trust the SCA. Right? So trust store is where you store the root SCA certificate from the ZAID. That is the trust anchor. Then you don't need to set up the trust policy. So in the trust policy, user needed to specify some properties. I will show you now. So in order to, set up a trust store,
51:05 to simulate, you copy the root state certificate to to our file system and then use that have the trust or coordinate. So in my case, I will copy the route to say certificate. If you remember, I have this, my company. Right? Cert. So this is just to simulate. The route stays. Normally, the route stays dedicated from, say, they will distribute to through some web storage or some preconfig system so that you can easily get. So now I simulate. I copy this root assay certificate, distributed or published the BIOS CA to my local file system. Okay.
52:03 I click. So I have the root say certificate. I set up the trust door first. Notation cert. Okay. Yeah. I want to mention that at the beginning, I used the notation cert generate test. Right? This command. So it actually helped me to set up the trust tool already. So I will show you. It is already set up if you use the generate test. So if the type is the same, that this is the trustor name, and this is the root certificate. So in real world, you needed to use notation cert add command to I add the root certificate that you
53:06 received from your signer. The signer should publish the guide on how to verify the signature. The signer will know that where the, route to say certificate is, if they will, publish, the information in in the guide. So you will use this command and a store name, your store, for example, and the file to the trust store. Because we already have this, so I don't need to do that. This is command. It's just to show in real world that you needed to use this notation cert command to to add. And then you can after that, you use
53:51 the notation cert list to check whether the store is, set up. Then you needed to configure the trust policy. Trust policy is actually a JSON document, so I have a template here. So let's take a look. Maybe just let's edit. Okay, it's a JSON format. This is the policy name, my policy, you can give it any name. And this is the registry scope, which is a list of repositories. So in our case, is that we have our image with the tag V1. Right? It is under the repository network. And this is my registry address. So signature verification,
54:53 by default, is strict. It means that the signature integrity, authenticity, and the revocation checking, expiry checking will be enforced. There are some other values, so, I will not demo those values today, but, you can check out, those values in Notreeable Project specification. Could that register scope be just your username, or do you have to explicitly state every single image? So currently, you have to specify a list of repository, not not the images, because for another NET monitor, we have V1, right? It could be V2, V3. We don't need to specify the tag. We just need to specify the repository.
55:44 So currently, it is the list of repository. We have a plan in the future to support on different level, for example, on registry level or on the namespace level. So that is for the future. Yeah. Okay. Cool. This is the trustor with this format, trustor type, trustor name. Our name, I think, is called the company. Right? Yes. And this is the trust identity. Trust identity is actually a subject the distribute distinguished name of your science science certificate. I will show you how you can get it. And normally, it will be also provided by your signer.
56:38 And actually, this is the identity you want to trust. You do not want to trust anyone one else, because for root CA certificates in real world, it can sign it can issue many signed certificates, right? All those signed certificates, are using the same root CA certificate. So this is the identity you want to trust. So how can I get this identity? Normally, it will from your signer who will publish the document to mention this is the identity you should trust. But for our case, for the self signed certificate, there is another convenient way. For example, you can use notation
57:26 cert show command. This one. You can type say a store mycompany.io and mycompany.io cert. It will obtained some details for the certificate. That is a lot easier than trying to remember the OpenSSL incantation. You. So you see the issuer subject, they are the same. Right? So because it is a self signed certificate, So you can just copy this to your trust policy. So let's get back to the trust policy. Basically, you copy it here. Okay? So with trust policy so I want to highlight that for another project, when we want to verify something, we start from zero trust.
58:36 You see, before I set up a trust store and trust policy, not not notation to trust no one. And for a user, you needed to be clear who you want to trust. You can just you you cannot just readily trust anything. Use a well cut. In that case, even you have the tools ready for sign verification to verify, but still you increase your security risk because you blindly trust everyone. So we set up a trust store for the anchor, for the CA that we want to trust. And then we set up the trust policy to specify that
59:23 which images we want to verify, which will be specified by the trust scopes, and also, what is the trust angle coming from and, who we are going to trust. Okay? So with that, let's notation import this policy. Sorry. I missed the policy import. I already have my test policy, so now I have my company policy. Okay. So after that, you will use policy show. You will see this is exactly the policy, right, we used in the JSON file. It is now imported into the notation configuration. Okay. With that, we can start to verify the images.
1:00:27 Notation verify and image sign. Okay. It's pretty fast because we're on the local, and we can use verbose flag to check more logs. Yeah. You can see it's checking the signature using the trust policy configuration, and, this is the signature digest if you remember previously we showed. Okay. I cleared the terminal, so we cannot see that. So this is the signature. So maybe I can use the ORAS command to discover. You see, this is the digest for the signature manifest. This is the signature that Notation Verify Commands verified against. Okay. Okay. Just now I demoed how to
1:01:37 do the verify in a CICD pipeline or build a system that normally in the real world, it it is normally that before you want to use some other images to build your application images, it could be base images or utility images. Before they want to use them for building your own application container images, you in your CICD pipeline, you verify it using Notation or any other manager experience that integrate with Notation. Okay. I think that the last demo will be how we can ensure our workloads running on Kubernetes is trusted. Okay? That, we need the gatekeeper
1:02:30 and the ratify. Okay. In the real world, if you use some vendor's cloud environment, for example, if you are using Azure, you can use Azure policy plus ratify. You don't need to install Gatekeeper. Or from error, there is a preview policy called AKS image integrity. You can also try it. That is actually a managed experience integrates both Gatekeeper and the Routing plan. So you do not need to install manually. Or in some other scenarios, for example, you you you say you you don't want to have the you don't want to use Gatekeeper. You want to use Keyverter.
1:03:25 That is also Okay. You can install Key Verner or any environment already integrated with Key Verner in any cloud, you can use Key Verner plus Notary Project Signature. You can still verify not reproject signature. So that is also something beautiful that I mentioned for another project, because we are aiming to be able to standardize the tools and produce standard interface, for example, in this case, signature. So that no matter what the tools produce the signature, because we have an author project specification, you can also build your own signature tools using based on lottery project signature specification.
1:04:13 So no matter what the tool produce the signature, no matter what tool you want to consume the signature, the signature format is standardized. So that is the beautiful thing that basically you can choose any tools based on your needs in any environment. Okay. So today, I will demo Gatekeeper plus Radify to help you to understand the logic for the signature verification on Kubernetes. So Gatekeeper is actually a Kubernetes native policy controller. So how it works? It is actually intercepting the API requests and evaluate them against some policies. So after evaluation, it will make a decision whether go or
1:05:09 not go so that it can decide whether the resource will be created, modified, or deleted. That is how Gatekeeper works as a policy controller. But how or why does Gatekeeper need to ratify? Gatekeeper actually has the external data provider interface. So in order for Gatekeeper to make a decision, Gatekeeper needed to have data, right, to have a data to evaluate against the policy, then make a decision. So RADIFY, in this case, serves as an external data provider to feed Gatekeeper with its verification results based on Radify's verifier. For example, in our case, Radify has the notation
1:06:05 as the verifier to verify another project's signature. And Radify provides these results to Gatekeeper. And the Gatekeeper, it has its policy to evaluate whether it is go or not based on the data from Ratify. Then the results can be decided whether to create, modify, or delete. So that's the whole logic behind that. Okay? Then we needed to install Gatekeeper. I think I have my yeah. I actually use Kubernetes that created by the Docker desktop. So I have everything containerized the toolings provided by the Docker desktop. So let me check my Kubit is running. Okay. It is running,
1:07:13 and the so I will use HAM. HAM is the tool to manage your packages on Kubernetes. It's popular. Okay. I already added because I did some tests. Now I want to install Gatekeeper. It's yeah. This command. It will install Gatekeeper from the repository I add. It will install it in the Gatekeeper system, this namespace. And you see here what I just explained. I set the external data. Basically, I enable it so that the RADify can communicate with Gatekeeper. Now I have filled it. I will copy this namespace because it's long. I will use it later.
1:08:23 Okay, let's check the pot. I just copied the namespace. Okay. You see DataKeeper. It's running now. It's very quick. Right? Now let's install the RADify. Yeah. So just now, I downloaded the root state certificate into my file system. Right? Actually, RADIFY will also use this root state certificate as a trust anchor because Radify actually integrates with Notre project. So it follows the Notre project specification to set up the trust door and the trust policy. So I will show you a command, and you will find it is very similar for what we did for trust store and
1:09:22 the trust policy. Let's make sure this repo okay. This repo already there. This is the command to install RADify. Okay. And the same name namespace as gatekeeper. This assert rotation is actually means the cert that's used for the secure connection between Radify and the gatekeeper. It is not the cert that's related to the site. Okay. You see the SAT file. This is actually means the root certificate that use the bind notation. So we just copy it to our local. So it could be also the HAM installation, it could be also in your DevOps assistant that you will execute,
1:10:22 and then the RADify package will be installed in Kubernetes. So this file could be on your DevOps file system or some storage. And you set you see the trust policies, the spreadsheet scope, the same as we did for our sensitive pipeline verifications error. Right? And also the trust policy, the trust store, the SA store, and use the first SA store that we we just set. And it is the identity we trust. We trust this identity. Right? You see, it is the same trust policy structure as we just did for the CICD scenario using notation. Okay.
1:11:17 With this, just with this one command, we install RADIFY, we also configure RADIFY. Okay. Let's check bot. Yeah. I don't think gonna be bot. Okay. Radify. Let me copy this. I'm switching to another window. I want to show the logs. Okay. The logs are important. I will we can switch to this window later. So let's switch back. So now we have a gatekeeper. We have a ratified, provide date to gatekeeper. We now we needed to set up the policies. Okay. This is the template file, according to the gatekeeper. And, we need another one. I will explain it
1:12:48 soon. Okay. You'll see we just applied the template and the constraints. Why we need to do that? So today, I demoed the the behind off the scene. Actually, if you want to use the managed experience, you don't have to do that. So I have these two file on my on my file system. So let's expand the template file first. Maybe not, maybe we can use this way. Okay. So is this template, constraint template, required by Gatekeeper? Please remember this name, Radifier Revocation. And you see, this is actually a policy written in regular language. So Gatekeeper
1:13:44 is using the OPA, Open Policy Agent. Actually, the policy is code as policy. So in our case, it is using Rego. So in this case, you will see for example, I skipped some other details. You can check later. So I jump to the bottom. You can see if it is not success, it will print out this block. Right? And it will verify whether remote data, for example, in our case, RADify provided has some errors. Okay? So please remember these keyboards. This is actually a policy we, write in a very a very simple policy for the for the,
1:14:40 for our, demo. We will see the constraint. You see, this is also according to Gatekeeper. You'll see this is a constraint for the ratified case, and you see the enforcement action. This is quite important. This means that if any failures, we will deny the deployment of the contended images. So in our case, if second nature verification failed, we will deny the deployment. So that means that image cannot be deployed. Okay. That that is the purpose. Right? Because untrusted images or unsigned images, they cannot be deployed. Okay. There are other effects. For example, if I remember clearly,
1:15:33 there are warning. So that means the image can be deployed, but there will be some warning logs generated that you needed to take a look. So this is actually helpful Before you are ready for production, you want to make sure everything works right. You want to check whether, images are properly signed to avoid any outage, during production, so that you can first set the enforcement to warning, so that you can audit the logs to see whether your images are properly signed, whether they are any images that should not be there. So after that, if you are
1:16:17 confident, then you can change the enforcement to deny, so that later on, any other images not assigned by the person or by the organization you trust or any outstanding images will be denied. Okay. So we have a gatekeeper. We have a ratify. We have our policy now. Then let's try it. Okay. Yeah. Okay. I put some text here so that we know new dogs are coming from here. And so let's firstly try the signed images. Demo signed. I want to use images from image environment. Okay. Okay. I think I needed to get it. Yeah, it could be that I tested this,
1:17:35 I forgot to delete the port. Nothing that kubectl delete pod dash dash old can't fix. Far too quick to reach for the dash dash all. Okay. Yeah. The delete takes time, I agree. Yeah. Even longer than the installation. Let's check. Oh, it's because you're using a sleep statement, which wouldn't respect Okay. The the signals. So it's waiting for the sec kill to happen after thirty seconds. That's all. Ah, I think you are right. Yeah. Now that's sleep demo, so many times I know the the gotchas. Okay. This is created. It's signed images, so let's check a log.
1:18:29 Okay. This is the new log. Yeah. After this text. So isSuccess true? Right? This is the images, if you remember this digest. And it's verified by the notation verifier. This is the artifact tab. As I explained, that RADify support verify other artifact tab. So in our case today, it is the signature. This is the certificate information. Okay? So that's the reason the product can be deployed. Let's try again to deploy an unsigned images. I have one in the DocHub. It is not signed. So let's check this. We use for us to discover whether they are signature.
1:19:36 Yeah. Okay. So there's no signature, just these images. So that's wrong unsigned. Okay. You see, yeah, denied, because we set the deny, right? If you remember this name, it is the constraint name. You can also customize it with your name. And this is actually the message. Follow the format that's defined in the policy. Right? So that means the admission controller gatekeeper check the data received from RADIFY. The verification is failed, and then it produces this message, and it then denied the request according to the policy. Then let's switch to RADIFY to see whether it is really
1:20:38 yeah. This one is for the NET monitor. This one is I think it's for us. Yes. For the on-site. This is a force. This is on-site. This is the char field. And the RADIFY produce these messages to and send it to gatekeeper. And the gatekeeper, according to the template and entity constraint, makes the decision. Okay. Perfect. Yeah. So just now we demoed how to prevent untrusted images to be deployed on your Kubernetes cluster. And I explained the behind the scene the logic for for it. And also, user has the flexibility to customize their policy using regular languages, and
1:21:29 in the future, we will support the CL cell languages, and the user can customize the error messages and also customize the effect, whether they want to deny or just read some warning logs. Okay. So in production yeah, in production, for example, on your premise Kubernetes, you can install Gatekeeper, Ratify by yourself if you want to do this customization. Or you can use Wonder Solutions error policy plus ratify, WorkKeep or no, something like that. Yeah. It's purely dependent on your own environment. But the idea is the same. The logic is the same. Yeah. Okay. I think that's the last one.
1:22:21 Yeah. It's a long process. Wow. So I can't believe you just did a demo for over an hour and I don't think anything actually went wrong. Like that was fantastic. Well done. Thank you. Recap that just to make sure we covered everything. Then I've got a couple of questions as well. What we started off with was building a container image. You use Buildx and then the OCI layout. We could take a look into that manifest and understand exactly what's going on there. We learned how to use ORS, particularly useful there I think was the ORS discover command,
1:23:00 which is fantastic for seeing what information we have on OCI artifacts within an OCI registry. Then took a look at the notation command. So there was a lot going on with the notary stuff there. Right? There's a generate test command to generate test keys. But really in production, what we want people to do there is use HashiCorp Vault or any of the KMS providers from Azure, AWS, and dual cloud, etcetera. Those allow you to sign artifacts and then push those signatures with push the new image with the signatures and the manifest to the registry. And even if that would have been a
1:23:36 fantastic demo, but then we moved further into the realm of Kubernetes, taking a look at how we can use a combination of gatekeeper archive, you said, web ratify inside of the cluster. So what I got there is that ratify is connecting to these policy engines within the cluster. The two main ones are OPA and gatekeeper and cavernal where it allows you to then provide validation hooks that just verify that whatever you want in the cluster is saying, there's a few questions there that we can go into, but I don't think any stone was left unturned
1:24:13 there. Pretty much showed us an entire pipeline from start to finish, which is fantastic. I think the question I had that was front and center for me was, is the integration with Kiverrno and Gatekeeper there because people already have these things in the cluster hopefully, Like why isn't ratify its own validation admission controller? Could it be run-in that fashion or is it dependent on Kivernal and Gatekeeper to some degree? Yeah, for X-ray for Kiboto, it does not need to ratify. Kiboto is self is at the vision control and itself already integrated with supporting the Notre projects in nature. Right. So
1:24:55 for Kibono case, you do not need to install ratify. You can, write Kibana YAML file similar as the trust policy I I show. That is the JSON format, but in Kibana, it is a YAML file that cook this native configuration style. So you just configure that to validate another project signature, and then you put your root state certificate there, and then you set up some trust policy. So similar as a RADIFY, but for Kibana case, you don't need to use Ratify as data provider. But for Gatekeeper, you needed to use that because Gatekeeper is more flexible framework.
1:25:38 Can I mean, user, you can plug in any data, external data? So in our case, it is RADIFY. But I want to say that for RADIFY, so currently, the main scenario is working with Gatekeeper at the admission control level. But the ratify in the community, we also have the vision to verify support with policy in the CICD pipeline. So for notation, you can only validate the signature because that is the notation job. But the ratify, as I mentioned, it can validate other artifacts and also ratify support of this rego policy. To ratify, we also plan to
1:26:25 have ratify integrated with any CICD system or even in a simple script. Just use ratify with the rego policy or sale policy to validate the signature, spawn, vulnerability, any artifacts. And Artify is also capable to integrate with ContenderD. So if you check the RADIFY community, we have a demo, we may have a POC with ratify integrated with candida D so that we can actually validate the image on the node level so just now what I show is from the cluster level for the elevation control, right? But to integrate with the Candidate, it can validate the image from the node level. So RADIFY
1:27:15 is capable to do many things. It is just at the current phase. It is just donated to the since they've at the sandbox project last year, we are mainly focusing on gatekeeper, this story, but later on, we will move on to implement other scenarios. That could be some new opportunities I can join this podcast to to showcase something in the future. Yeah. I mean, two fantastic things there. First, the common expression language, the cell support. I've spoken to many people and I have tried myself to write Reagle. I find it very difficult. So being able
1:27:55 to support cell, I think is a great and present developer experience for people, I believe. And also the container D integration is fantastic because we've ratify web gatekeeper. It can get past the validation checks and then the API server, but what container D actually pulls to the cluster is a completely different attack surface. So that integration is also phenomenal there. That's fantastic stuff. The only other question that I had front and center, but the other question I had at the back of my mind was when we done the notation commands, you did turn on notary experimental
1:28:30 features. What is the plan there then to get that away from experimental and generally available for everyone to start considering today? Yeah. So we actually have this OCR layout support years ago. So why it is experimental is because at that time, OCR image layout is not well is not widely adopted in the in the build system. So normally, people will just be able to push to the registry. So for the OCI image layout, it is not wildly adopted yet, and also people needed to do some changes on their builder system to produce the OCA image layout.
1:29:15 And also from publishing image point of view, they also needed to maybe modify their current publishing process to transfer these files to some environment or storages. So that is the main purpose. Main reason, it is in the experimental feature status. But with recently, you noticed that even Docker desktop support the content ID, right, the runtime. So that is open another door for the OCI image nodes. And we see there will be many folks, many scenarios or real world examples will come. Because with Candidate, so before that, if you use Docker to build, and you can use Docker save, right,
1:30:09 save something or even save a Docker table. But that Docker table is Docker format. It is not standardized. But with Candida D engine, you use Docker, say, you actually can save OCR image out. So people, they don't know the the the Tableau format, so normally they just use it. But the Docker table format, actually, when you load it, the digest, you needed to check the digest dataset. But with OCI image layout, as I just showcased, with the Identity support, Docker save OCI image layout format. It is the standard according to the OCI standard. It can be distributed
1:30:55 anywhere with the unified identity digest not changed. That is the I see that is the movement that in the future, the OSA image layout could be popular used. So when that comes, we will make this feature stable for you. That that is the background about this. Awesome. Well, that was fantastic. Thank you so much for taking time out of your day to sit here show us how to make our container images secure from local dev all the way into production. So you will be in London. So if anyone is watching us before KubeCon London, make
1:31:40 sure to go and see these talks. And I'm assuming you'll maybe be on the maintainer booths for Notary and for Ratify. Right? Yeah. But in yeah. I will be on the project booths, not a project, definitely. And for ORs, I'm a contributor. I can also answer questions. I will also host the Docker project, the maintenance track, the a separate session. I will also have a lightning talk, introduce some new features. Keeping yourself busy. Yeah. Yeah. So yeah. Welcome. So that's hopefully, we can meet in person at the moment. Yeah. Alright. Well, thank you so much for all your
1:32:25 contributions. You know, security and container stuff is not always glamorous, but it is so paramount, the future of what we're doing with Kubernetes and cloud native. So to you and all the other maintainers of all these projects, thank you so much for your time and effort. Thank you. Thank you, David. You you did a very good summary just now. Basically, captured everything. I know this is I I said that before, it will be around twenty minutes. Right? But during the hands on process, I explained it actually takes one hour or fourteen minutes. But you captured everything
1:33:02 for the for the key key parts. That is very good. And also, I noticed at the beginning, you played that music. It's a very it's actually a customized music. Yeah. Yeah. They are integrity sign published. Think that is really good. Maybe you can share that to me. Will share with the community. That is fantastic. Yeah. Yes, I will share that with you. Feel free to drop that into your Slack channels or whatever you want with people. But again, this is the least I can do to tell the amazing contributors and maintainers out there making open source more secure.
1:33:38 Thank you so much again. Yeah. Thank you. Alright. Well, have a great day, a great weekend. I'll hopefully see you in London and to everyone who watched. We hope you found this useful and until next time. Bye. Yep. Same to you. Bye. Bringing you these deep dives into the cloud native world. Don't forget to like, subscribe, and hit that notification bell so you never miss a session. Keep building, keep learning, and keep it secure. We'll see you next time. Peace out.
Technologies featured
Meet the Cast
Stay ahead in cloud native
Tutorials, deep dives, and curated events. No fluff.


Comments